Monday Kids LM393 DIY Light Operated Switch Kit Light Control Switch Photosensitive DIY Electronic Trigger Output Mode Module Funny DIY Kit
$1.53
Availability:
In stock
SKU
EK197
Payment Security

We are PayPal Verified
PayPal is a secure and trusted payment processing service that allows you to shop online. PayPal can be used at mondaykids.com to purchase items by Credit Card (Visa, MasterCard, Discover, and American Express), Debit Card , or E-check (i.e. using your regular Bank Account).
- Brand Name: Monday Kids
- Condition: New
- Type: Logic ICs
- Operating Temperature: -20 ~ 60 Celsius
- Dissipation Power: none
- Model Number: Light Switch Kit
- Supply Voltage: 5-6V
- is_customized: Yes
- Application: Electronic Circuit
- Model: OPS-1
- Quiescent Current: 1.5mA
- Passive load Maximum power: 300W
- Active load Maximum current: 400mA
- Size: 45*38mm
- Work Voltage: 5-6V
|
Please NOTE : we have documents of most of products in our store If you need it , contact us :) |
|
|

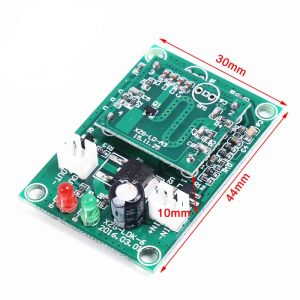
1 . Description.
1>. It is DIY kit. User need to weld it.
2>. Trigger mode and output mode.
1).Set trigger mode by JMP1:
Light trigger mode:Relay OFF in dark environment.Relay ON in bright environment.1-3
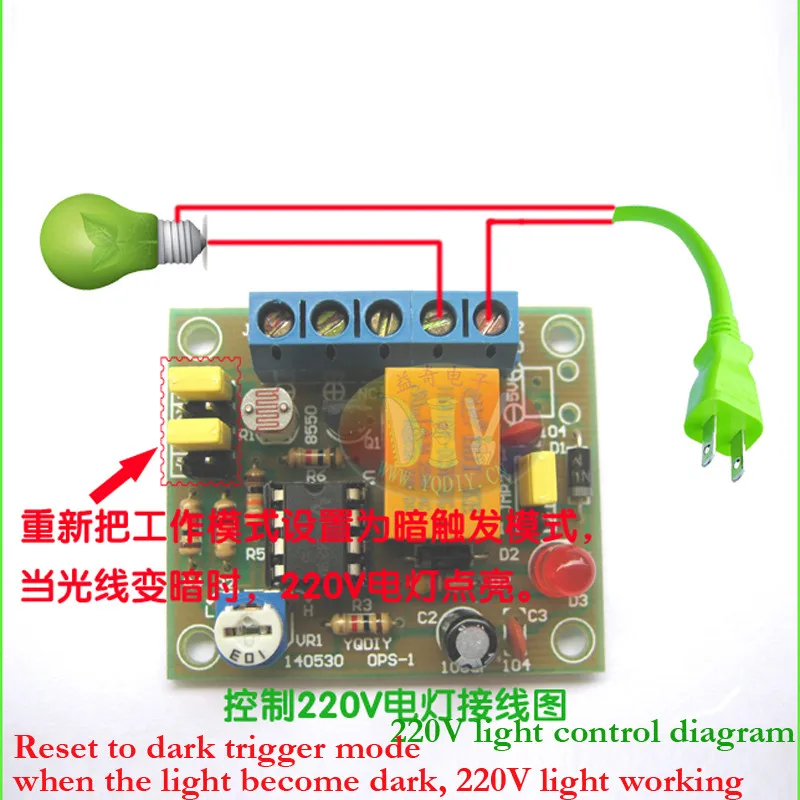
Dark trigger mode: Relay ON in dark environment.Relay OFF in bright environment.2-4
2).Set output mode by JMP2:
1-2: Relay is not allowed to work
2-3: Relay is allowed to work
2. Overview.
1>. Model: OPS-1
2>. Name: Light-Operated Switch DIY Kit
3>. Size: 45*38mm
4>. Work Voltage:5-6V
Quiescent Current: 1.5mA
Passive load Maximum power: 300W
Active load Maximum current: 400mA
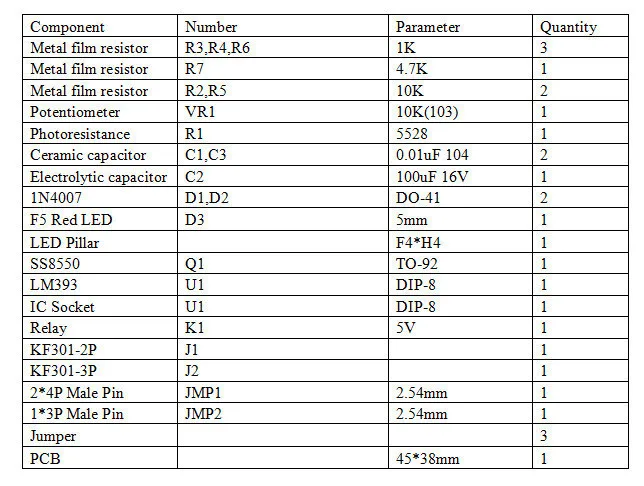
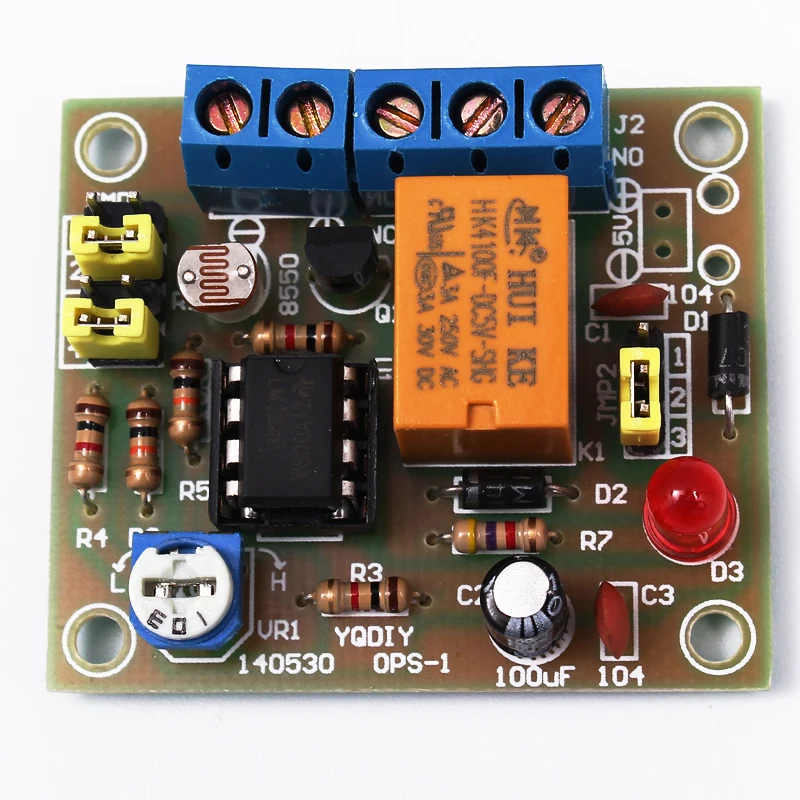
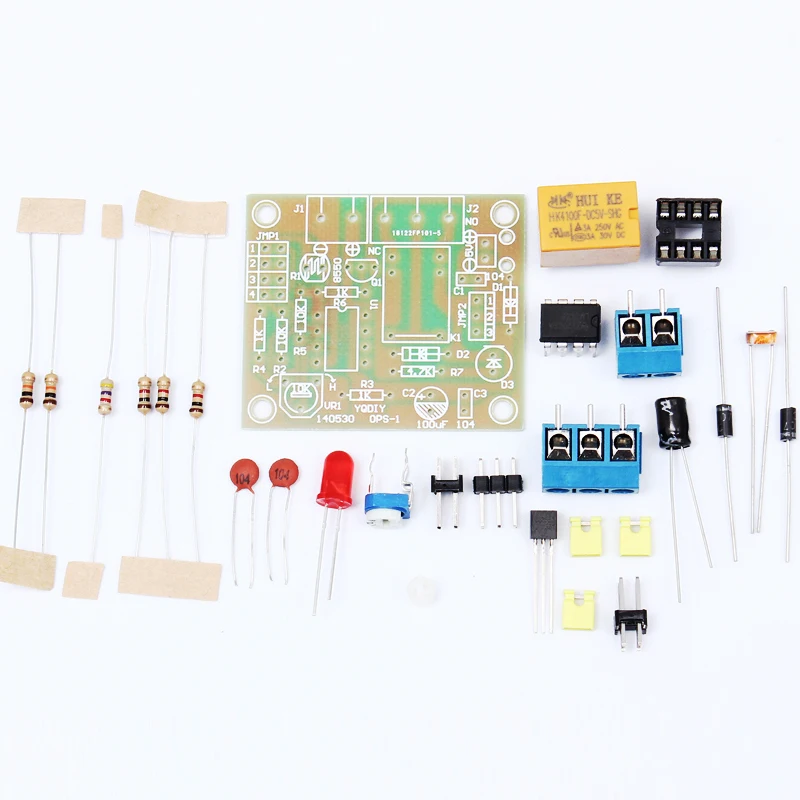
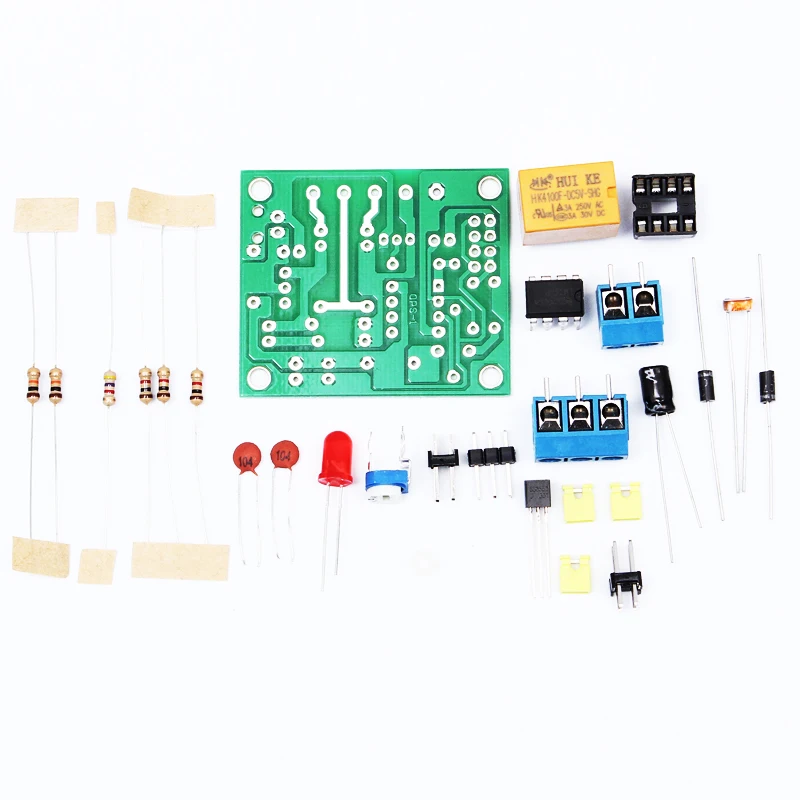
3. Component listing.
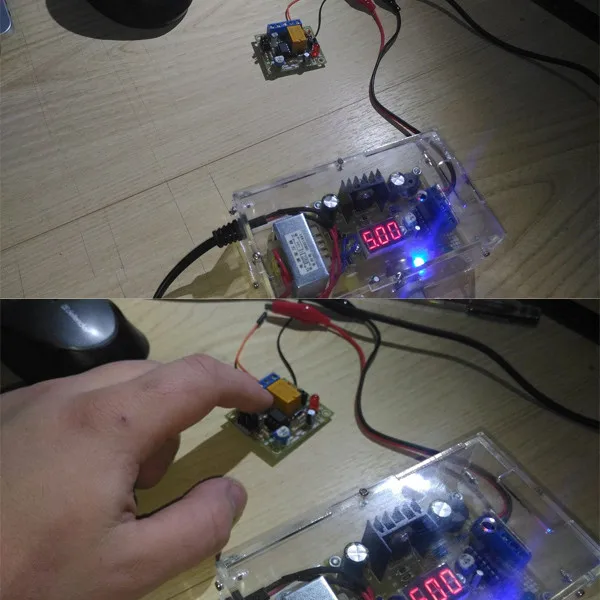
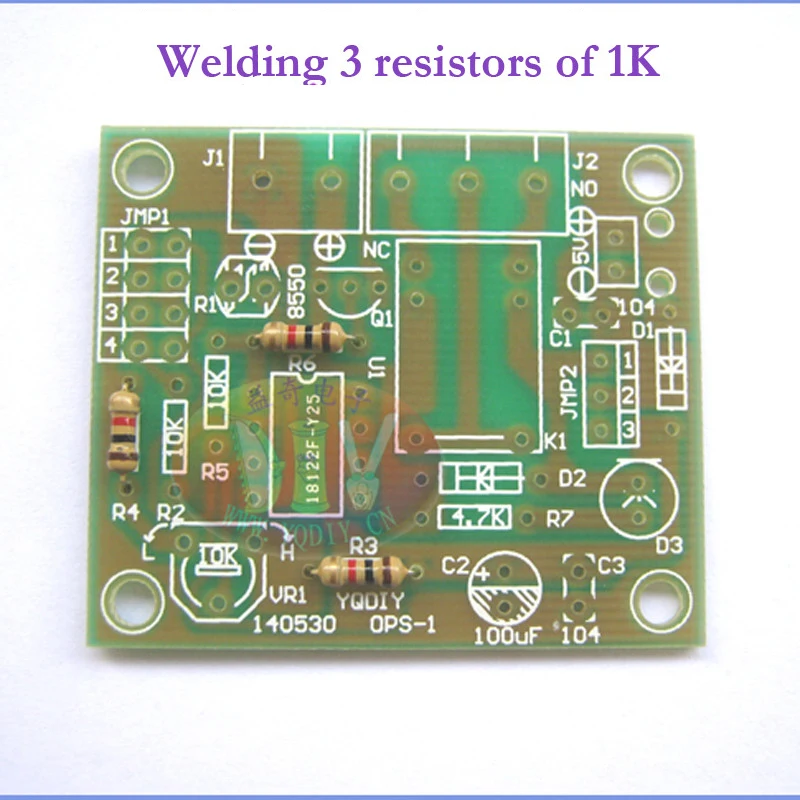
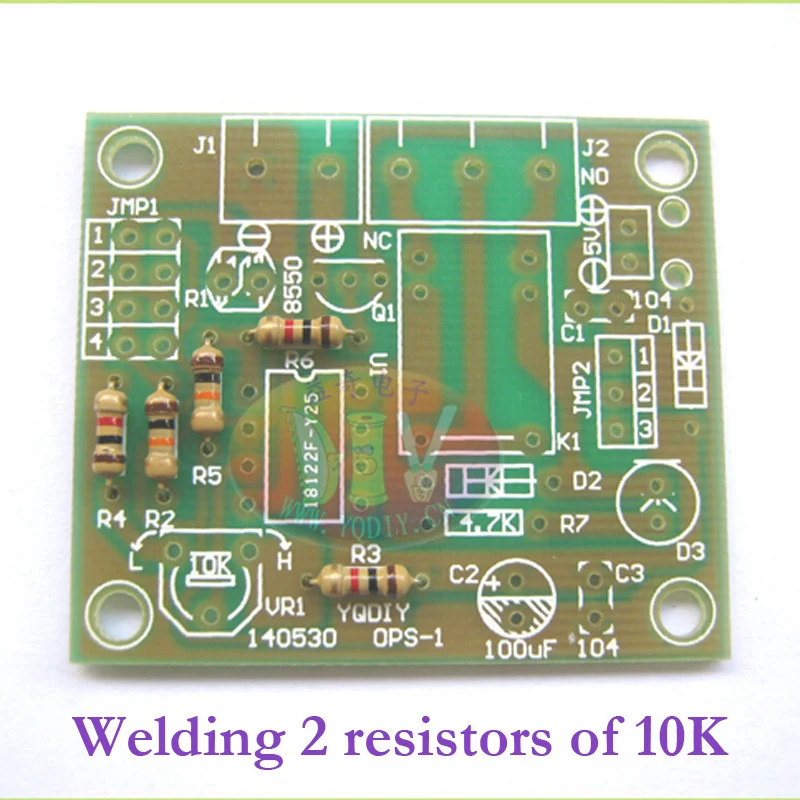
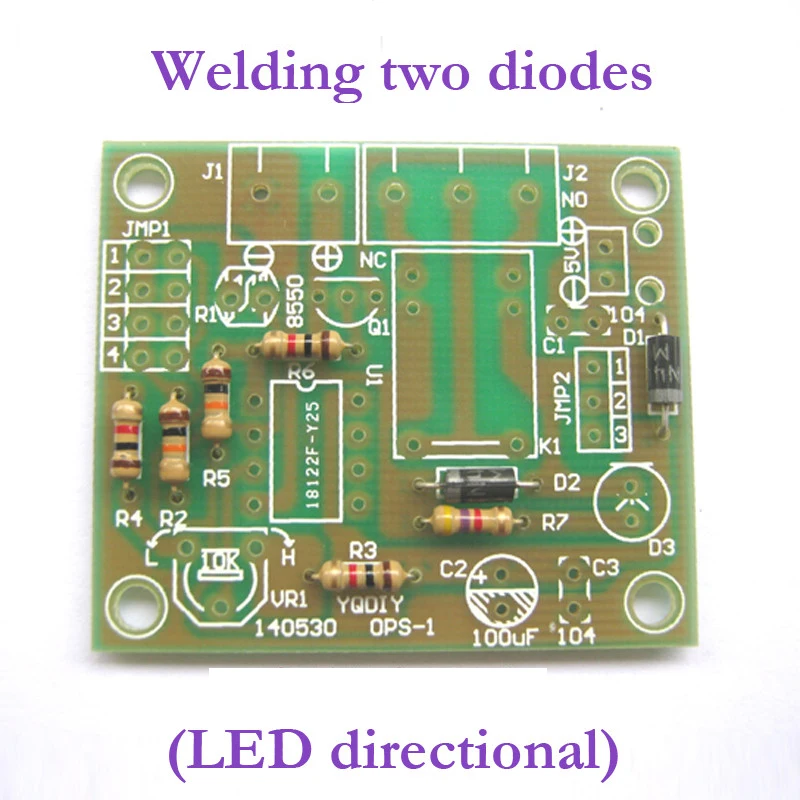
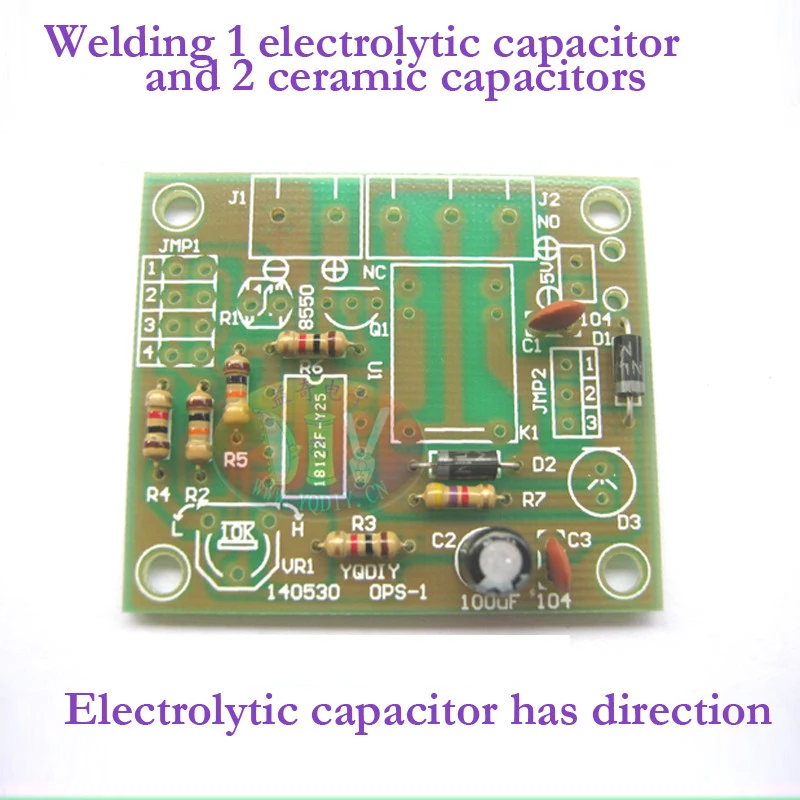
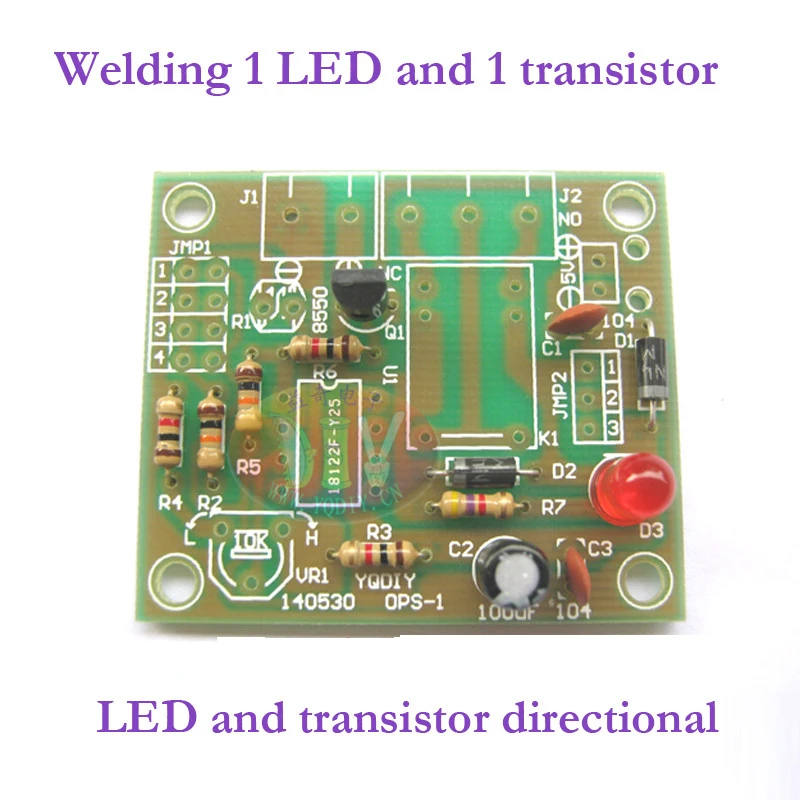
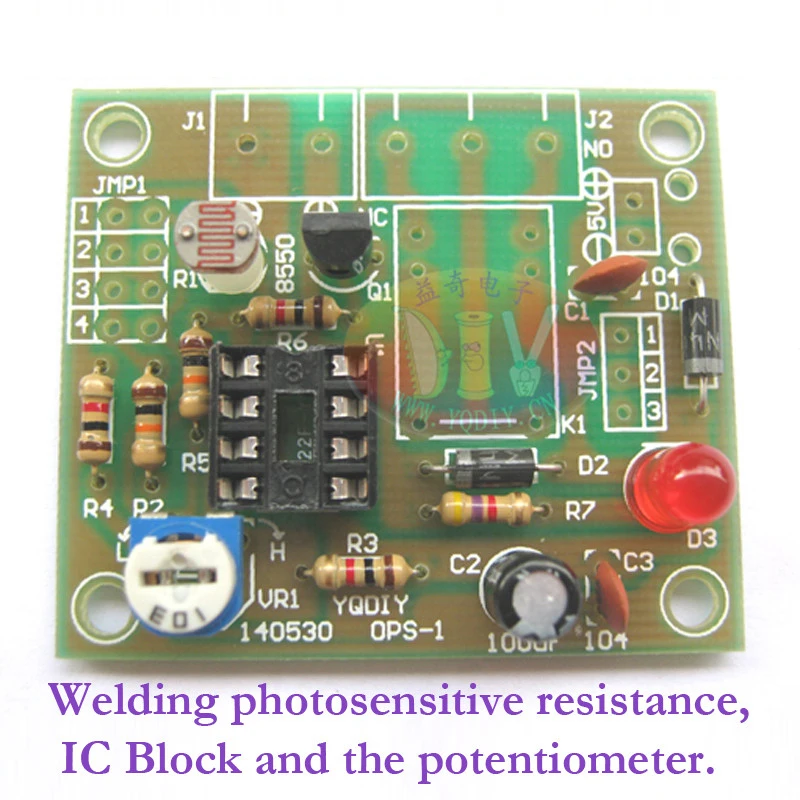
Welding process:
1. Welding 3 resistors of 1K
2. Welding 2 resistors of 10K
3. Welding two diodes (LED directional)
4.Welding an electrolytic capacitor and two ceramic capacitors (electrolytic capacitor has direction).
5. Welding 1 LED and 1 transistor (LED and transistor both have directions).
6. Welding photosensitive resistance, IC Block and the potentiometer.
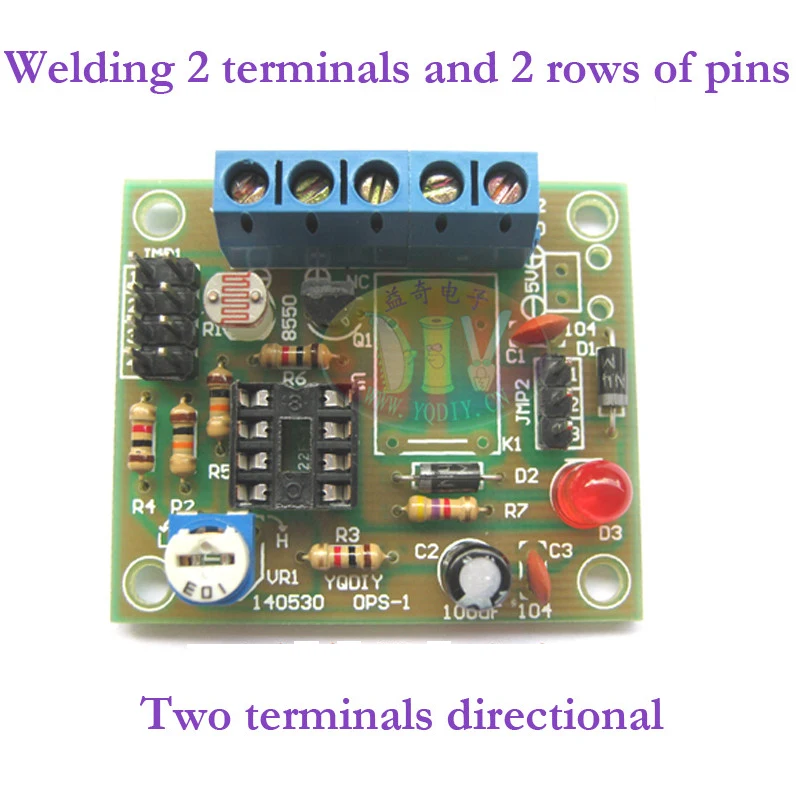
7. Welding 2 terminals and 2 rows of pins (two terminals directional).
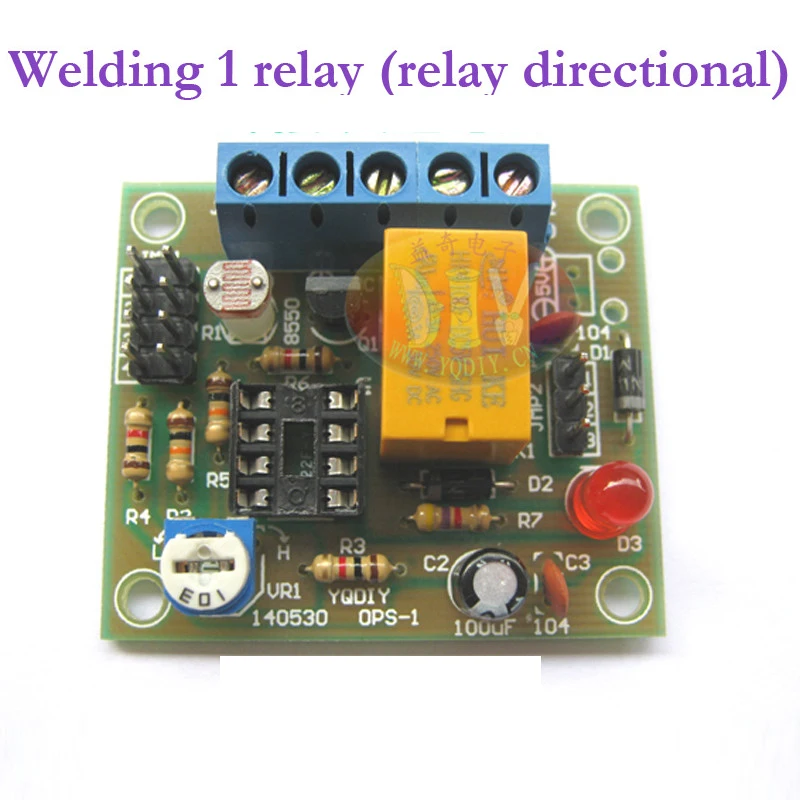
8. Welding 1 relay (relay directional).
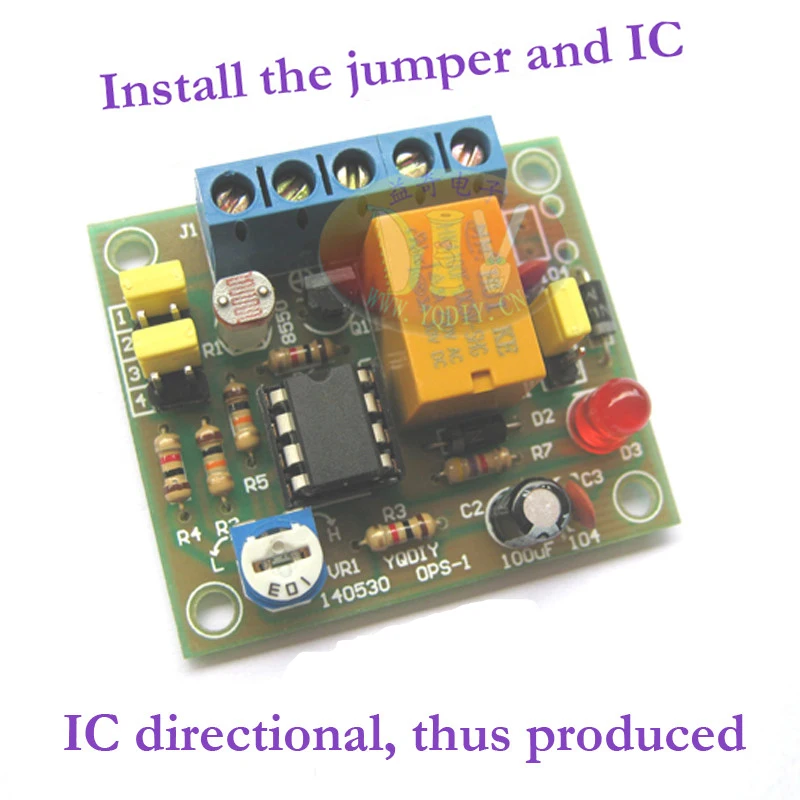
9. Install the jumper and IC (IC directional), thus produced.
Underside of the solder joint distribution:

The trigger mode and relay working status Illustration:
light trigger mode, allow the relay setting

Dark trigger mode, restrict relay setting

OPS-1 light control switch terminal Illustration:
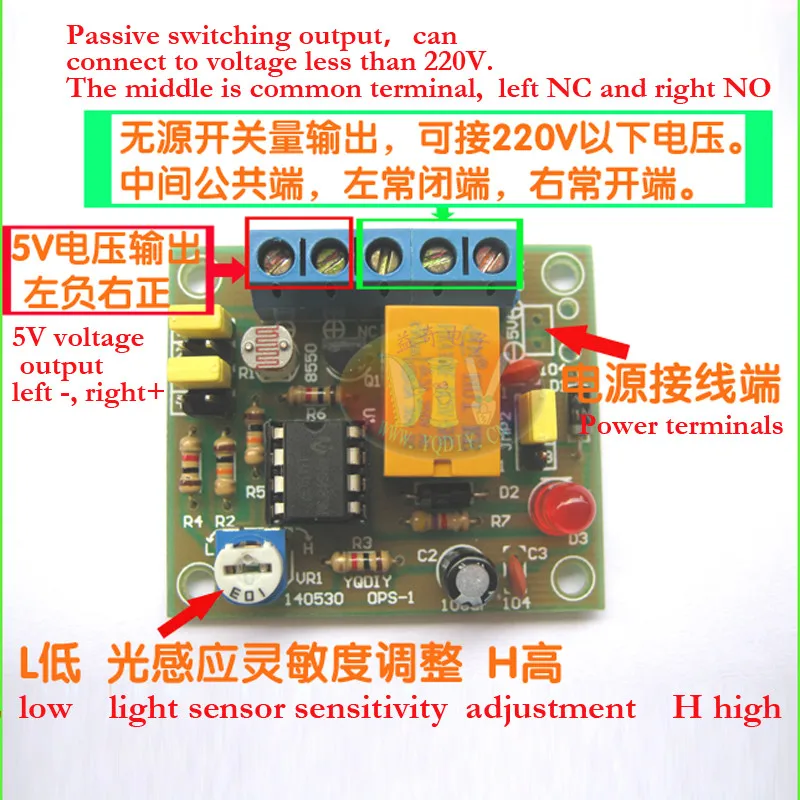
OPS-1 Passive switching output Application diagram:


- Unit Type: piece
- Package Weight: 0.03kg (0.07lb.)
- Package Size: 15cm x 12cm x 10cm (5.91in x 4.72in x 3.94in)
Write Your Own Review
Discover More Products from Its Parent Categories: