Monday Kids SHT20 Humidity Temperature Controller DC 12V 0-100%RH -20-60 Celsius Digital LCD Display 2-Channel Relay Module
$11.78
Availability:
In stock
SKU
EK881
Payment Security

We are PayPal Verified
PayPal is a secure and trusted payment processing service that allows you to shop online. PayPal can be used at mondaykids.com to purchase items by Credit Card (Visa, MasterCard, Discover, and American Express), Debit Card , or E-check (i.e. using your regular Bank Account).
- Brand Name: Monday Kids
- Supply Voltage: DC 12V
- Condition: New
- Type: Logic ICs
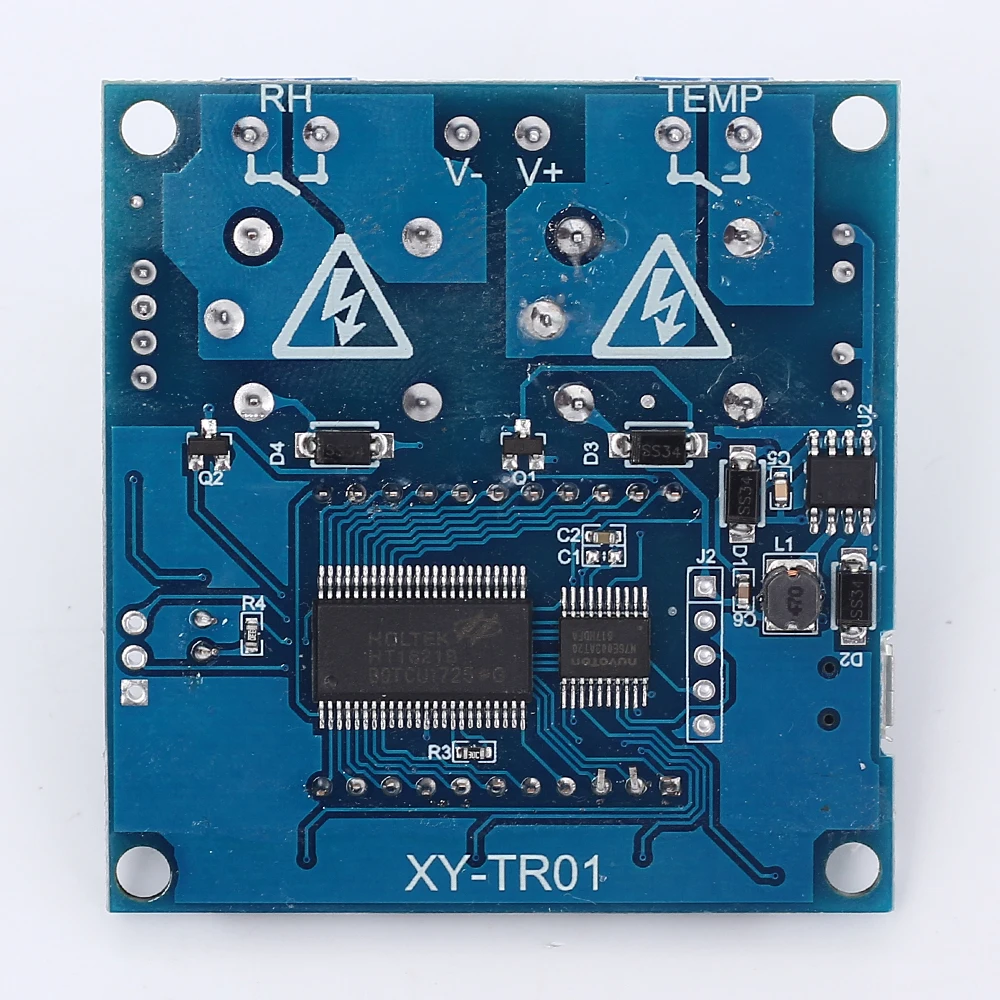
- Model Number: XY-TR01
- Operating Temperature: -20~60 Celsius
- Dissipation Power: none
- is_customized: Yes
- Application: for Temperature control
- Input voltage: DC 12V
- Temperature range: -20~60 Celsius
- Humidity range: 00%-100%RH
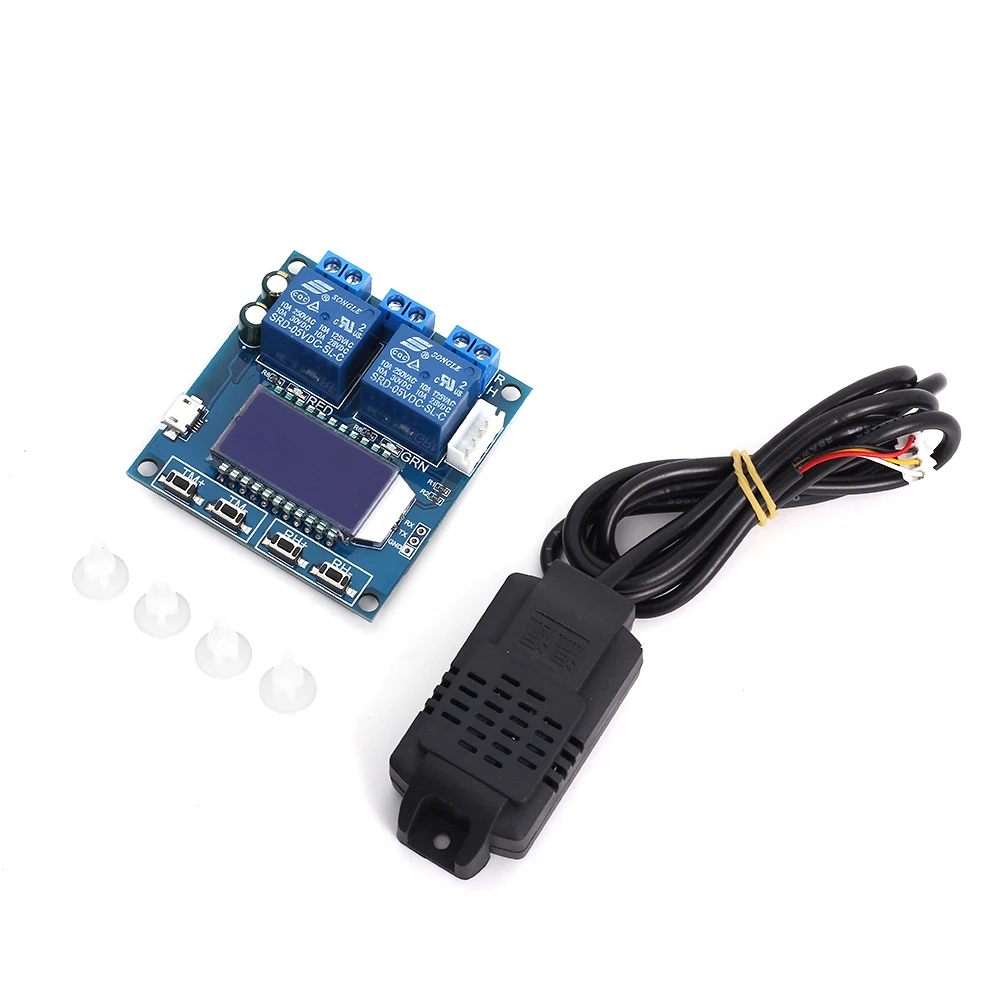
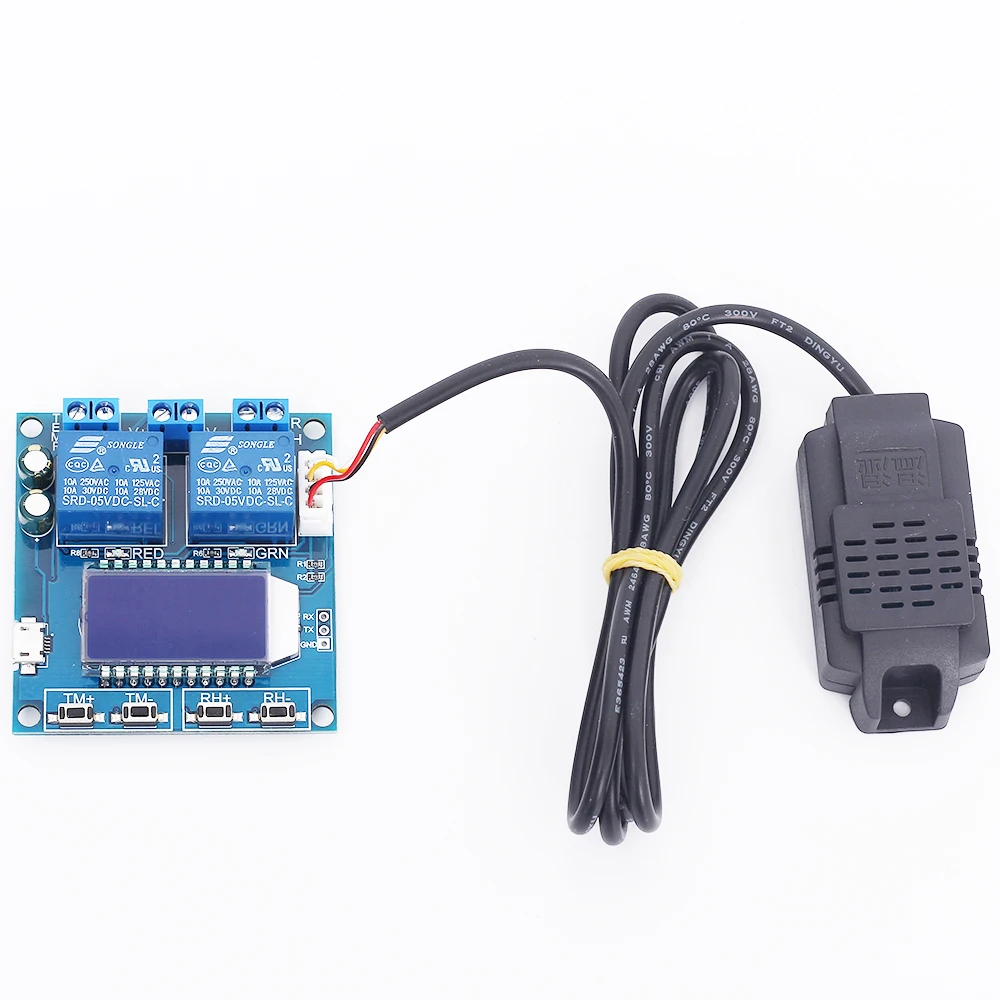
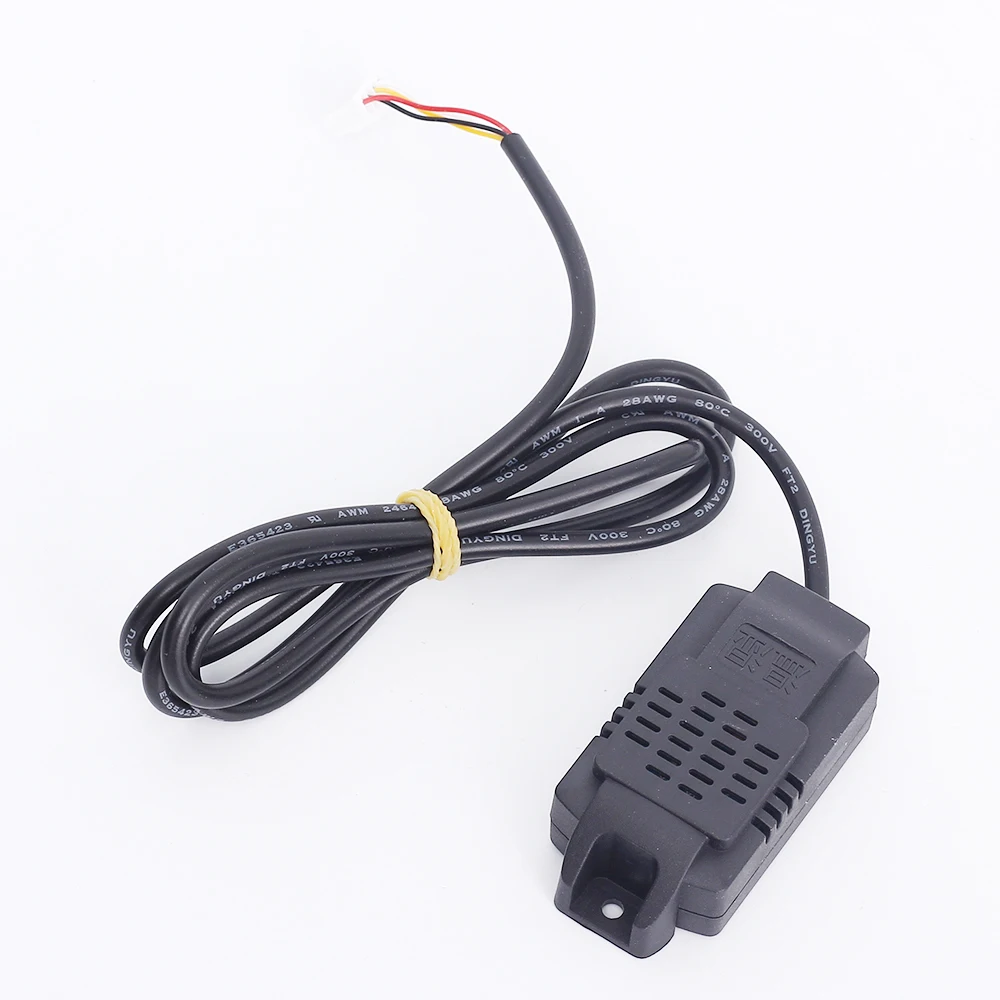
- Sensor: 1 Meter Temperature and humidity sensor
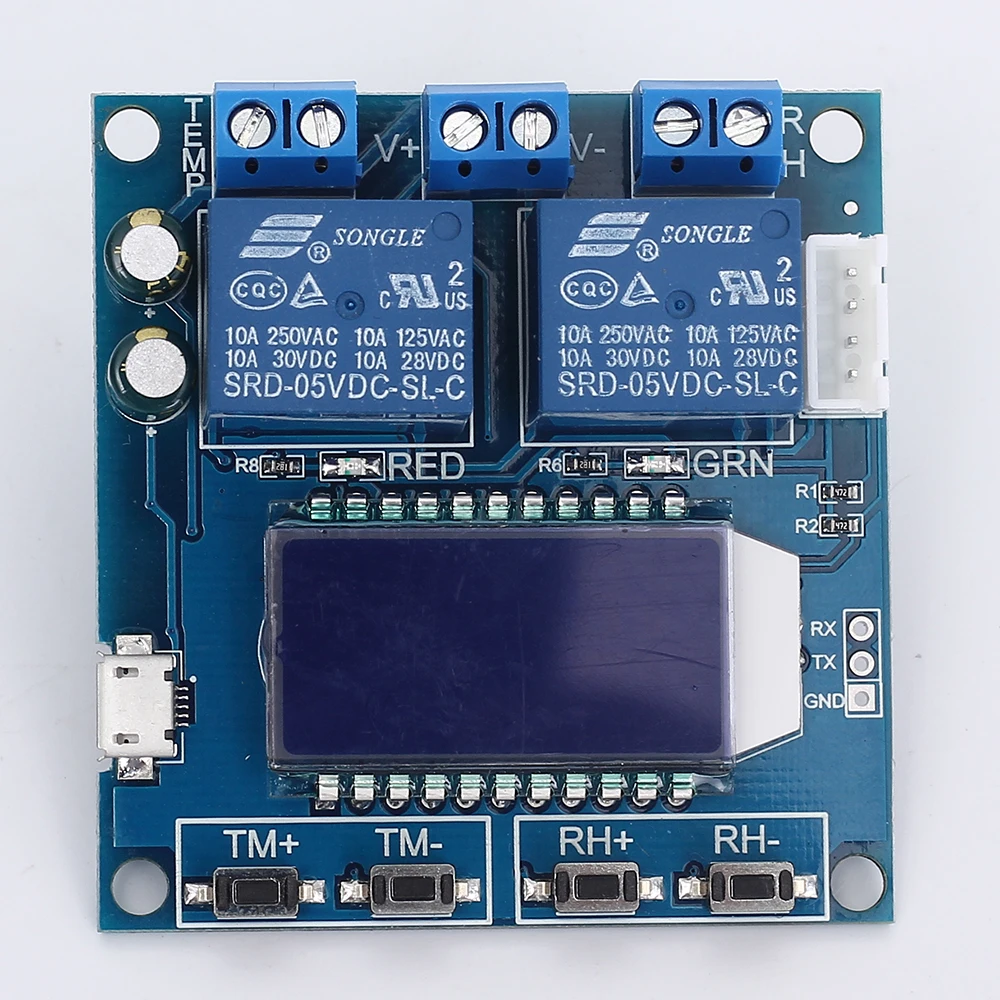
- Output Type: Relay Output(Switch Output)
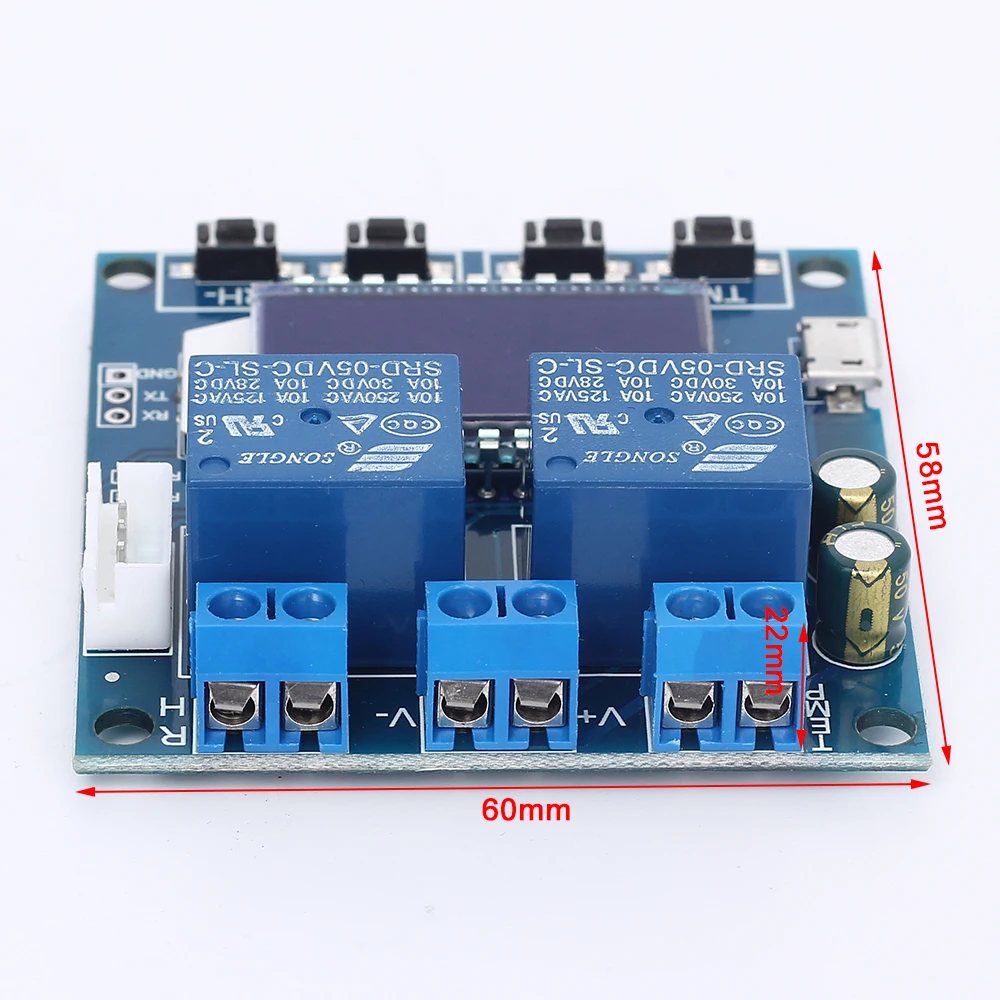
- Size: 60*58*22mm

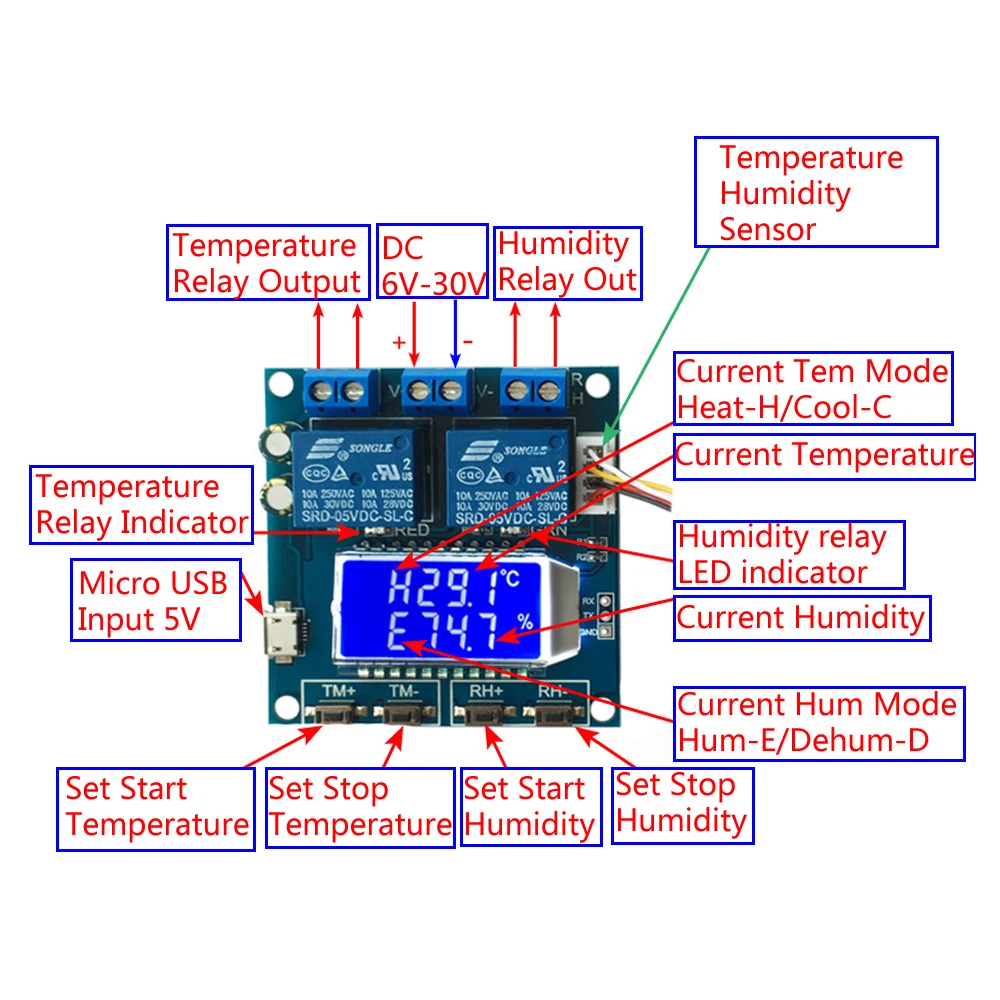
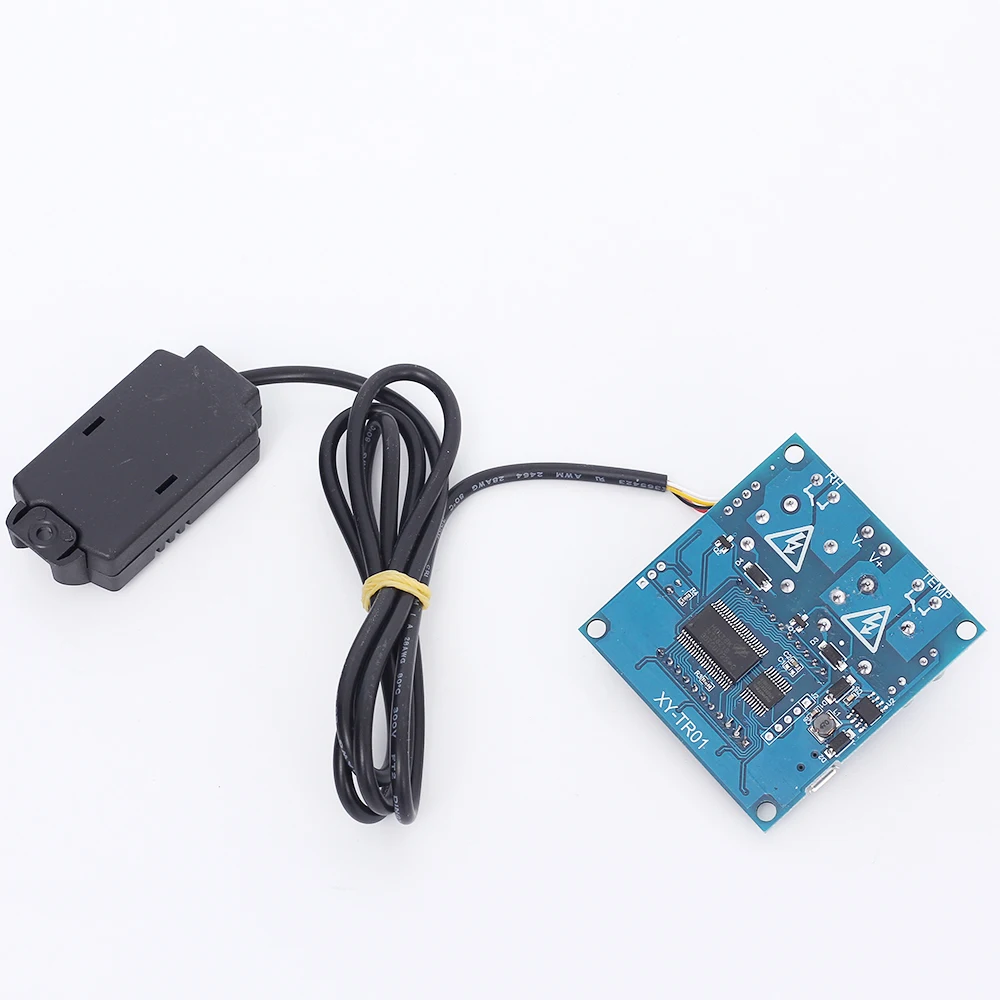
1.Description:
XY-TR01 Temperature and humidity control module high precision digital display word double output automatic constant temperature and humidity control panel.
Product adopts industrial-grade chip, high-precision SHT20 temperature and humidity sensor.
2.Features:
1>.Support UART;
2>.LCD high definition display;
3>.Support measurement temperature and humidity at the same time;
4>.Support Micro USB input;
5>.Working mode is automatically adjusted;
6>.High precision detection.
3.Parameters:
1>.Product name: Humidity Temperature Controller;
2>.Model: XY-TR01;
3>.Temperature range:-20℃~60℃;
4>.Humidity range:0%-100%RH;
5>.Control precision:0.1℃ & 0.1%RH;
6>.Output type:Relay output;
7>.Rated load:10A(MAX);
8>.Size of Controller:60*58*22mm
9>.Size of Sensor probe:60*30*20mm
10>.Length of Sensor cable:1meter
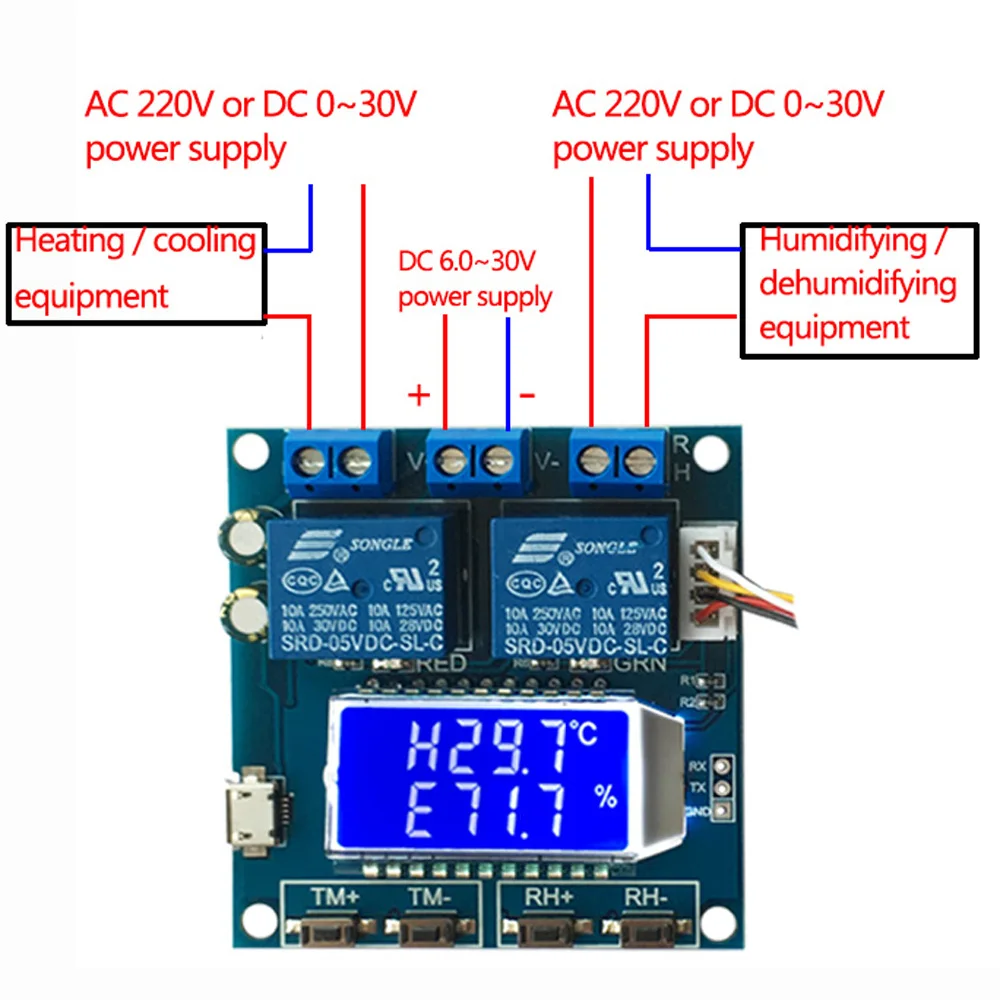
4.Temperature function:
1>.Automatic recognition of working mode:
The module automatically selects the working mode according to the Start Temperature and Stop Temperature.
Start Temperature is more than stop temperature, Turn ON cooling mode 'C'.
Start temperature is less than stop temperature, Turn ON heating mode 'H'.
2>.Cooling Mode 'C':
Relay turn ON and Red Indicator turn ON and Refrigeration equipment starts working if connect load when Current Temperature is more than Start Temperature.
Relay turn OFF and Red Indicator turn OFF and Refrigeration equipment stops working if connect load when Current Temperature is less than Stop Temperature.
3>.Heating mode 'H':
Relay turn ON and Red Indicator turn ON and Heating equipment starts working if connect load when Current Temperature is less than Start Temperature.
Relay turn OFF and Red Indicator turn OFF and Heating equipment stops working if connect load when Current Temperature is more than Stop Temperature.
4>.Temperature Correction ‘ OFE ’(-10.0~10.0℃):
The system may have errors if it works for a long time, it can be corrected by this function.
Actual Temperature = Measured Temperature + Calibration Value.
Setting method:
4.1>.Double-click button 'TM+' in the normal running interface into Temperature Correction setting interface.The first line shows the type of correction value(OFE or RH).The second line shows the specific value.
4.2>.Switch to select modified parameters by short press button ‘TM-’.
4.3>.Short press button ‘RH+’ and ‘RH-’ to set the specific value.Support long press.
4.4>.After the parameters have been modified, double-click button ‘TM+’ to save the data and exit the correction value setting interface.
5>.Set Start/Stop Temperature:
Keep press button 'TM+' for 3second in the normal running interface into Start Temperature setting interface.Short press button 'TM+' or 'TM-' to set parameters value.After the parameters are modified and then wait for 6s to automatically save and exit.
Keep press button 'TM-' for 3second in the normal running interface into Stop Temperature setting interface.Short press button 'TM+' or 'TM-' to set parameters value.After the parameters are modified and then wait for 6s to automatically save and exit.
6>.Relay enable (default on):
Short press button ‘TM-’ in the normal running interface.Turn ON or OFF temperature relay output enable.Screen will display ‘℃’ and flashes if If the temperature relay is OFF.
5.Humidity function:
1>.Automatic recognition of working mode:
The module automatically selects the working mode according to the Start Humidity and Stop Humidity.
Start Humidity is more than stop Humidity, Turn ON dehumidification mode 'd'.
Start Humidity is less than stop Humidity, Turn ON humidification mode 'E'.
2>.Dehumidification Mode 'd':
Relay turn ON and Green Indicator turn ON and Dehumidification equipment starts working if connect load when Current Humidity is more than Start Humidity.
Relay turn OFF and RED Indicator turn OFF and Dehumidification equipment stops working if connect load when Current Humidity is less than Stop Humidity.
3>.Humidification mode 'E':
Relay turn ON and Green Indicator turn ON and Humidification equipment starts working if connect load when Current Humidity is less than Start Humidity.
Relay turn OFF and Green Indicator turn OFF and Humidification equipment stops working if connect load when Current Humidity is more than Stop Humidity.
4>.Humidity Correction ‘ RH ’(-10.0~10.0%RH):
The system may have errors if it works for a long time, it can be corrected by this function.
Actual Humidity= Measured Humidity+ Calibration Value.
4.1>.Double-click button 'TM+' in the normal running interface into Temperature Correction setting interface.The first line shows the type of correction value(OFE or RH).The second line shows the specific value.
4.2>.Switch to select modified parameters by short press button ‘TM-’.
4.3>.Short press button ‘RH+’ and ‘RH-’ to set the specific value.Support long press.
4.4>.After the parameters have been modified, double-click button ‘TM+’ to save the data and exit the correction value setting interface.
5>.Set Start/Stop Humidity:
Keep press button 'RH+' for 3second in the normal running interface into Start Humidity setting interface.Short press button 'RH+' or 'RH-' to set parameters value.After the parameters are modified and then wait for 6s to automatically save and exit.
Keep press button 'RH-' for 3second in the normal running interface into Stop Humidity setting interface.Short press button 'RH+' or 'RH-' to set parameters value.After the parameters are modified and then wait for 6s to automatically save and exit.
6>.Relay enable (default on):
Short press button ‘RH-’ in the normal running interface.Turn ON or OFF humidity relay output enable.Screen will display ‘%’ and flashes if If the temperature relay is OFF.
6.Use steps:
1>.Connect sensor to controller;
2>.Connect to power supply to controller;
3>.Adjust Start Temperature,Stop temperature and Temperature Correction;
4>.Adjust Start Humidity,Stop Humidity and Humidity Correction;
5>.Enable relay output according requirement;
6>.Remove power supply;
7>.Connect to load with power supply at relay output terminal if need at Step5;
8>.Connect to power supply for controller again;
9>.Test and working!
7.Additional features:
1>.Set or read data by UART.
Parameters such as start temperature/humidity, stop temperature/humidity, temperature/humidity correction, etc. can be set through the UART.
2>.Temperature/Humidity real-time reporting.
The controller module will report the current temperature/humidity to the terminal equipment by the UART at intervals of 1 second to facilitate data acquisition if the temperature/humidity reporting function is turned ON.
3>.Relay enable (default on).
If the relay enable is turned off, the relay remains off.
That is, the output state will never change, no matter what the measured temperature/humidity is.
8.UART communication and parameter settings
The system supports UART data upload and parameter setting functions (TTL level);
UART: 9600, 8, 1
1>.start : Start test value report
2>.stop : Stop test value report
3>.read : Read setting parameters
4>.T:ON : Temperature Relay enable ON
5>.T:OFF : Temperature Relay enable OFF
6>.H:ON : Humidity Relay enable ON
7>.H:OFF : Humidity Relay enable OFF
8>.TS:XX.X : Set Start Temperature Value (-20.0~60.0℃)
9>.TP:XX.X : Set Stop Temperature Value (-20.0~60.0℃)
10>.HS:XX.X : Set Start Humidity Value (00.0%~100.0%RH)
11>.HP:XX.X : Set Stop Humidity Value (00.0%~100.0%RH)
12>.TC:XX.X : Temperature calibration (-10.0~10.0℃)
13>.HC:XX.X : Humidity calibration (-10.0~10.0%RH)
Temperature and humidity data upload format:
Temperature format: work mode (H/C), Current Temperature, Temperature relay status;
Humidity format: work mode (E/D), Current Humidity, Humidity relay status;
For example:
H, 20.5℃, CL: Heating Mode, Current Temperature 20.5℃, Temperature relay is OFF.
D,50.4%,OP:Dehumidification mode,Current Humidity 50.4%RH,Humidity relay is ON.
9.Application:
1>.Control cabinet;
2>.Production workshop;
3>.Hatching aquaculture control;
4>.Tobacco industry;
5>.Printing house;
6>.Aquarium temperature control;
7>.Bedroom.
10.Please Note:
1>.It is a relay output mode and cannot be used as a power module. It cannot output voltage. The load needs to be connected to a separate power supply.
11.Package:
1>.1pcs XY-TR01 Humidity Temperature Controller;
2>.1pcs XY-MD01 SHT20 Sensor;
3>.4pcs White isolation seat.

- Unit Type: piece
- Package Weight: 0.1kg (0.22lb.)
- Package Size: 1cm x 1cm x 1cm (0.39in x 0.39in x 0.39in)
Write Your Own Review
Discover More Products from Its Parent Categories: