Monday Kids DIY Electronit FM Radio Kit Bluetooth-Compatible Amplifier Stereo Speaker 3W*2 Spectrum Indicate Music Player Soldering Practice
$23.19
Availability:
In stock
SKU
BK-DG-2
Payment Security

We are PayPal Verified
PayPal is a secure and trusted payment processing service that allows you to shop online. PayPal can be used at mondaykids.com to purchase items by Credit Card (Visa, MasterCard, Discover, and American Express), Debit Card , or E-check (i.e. using your regular Bank Account).
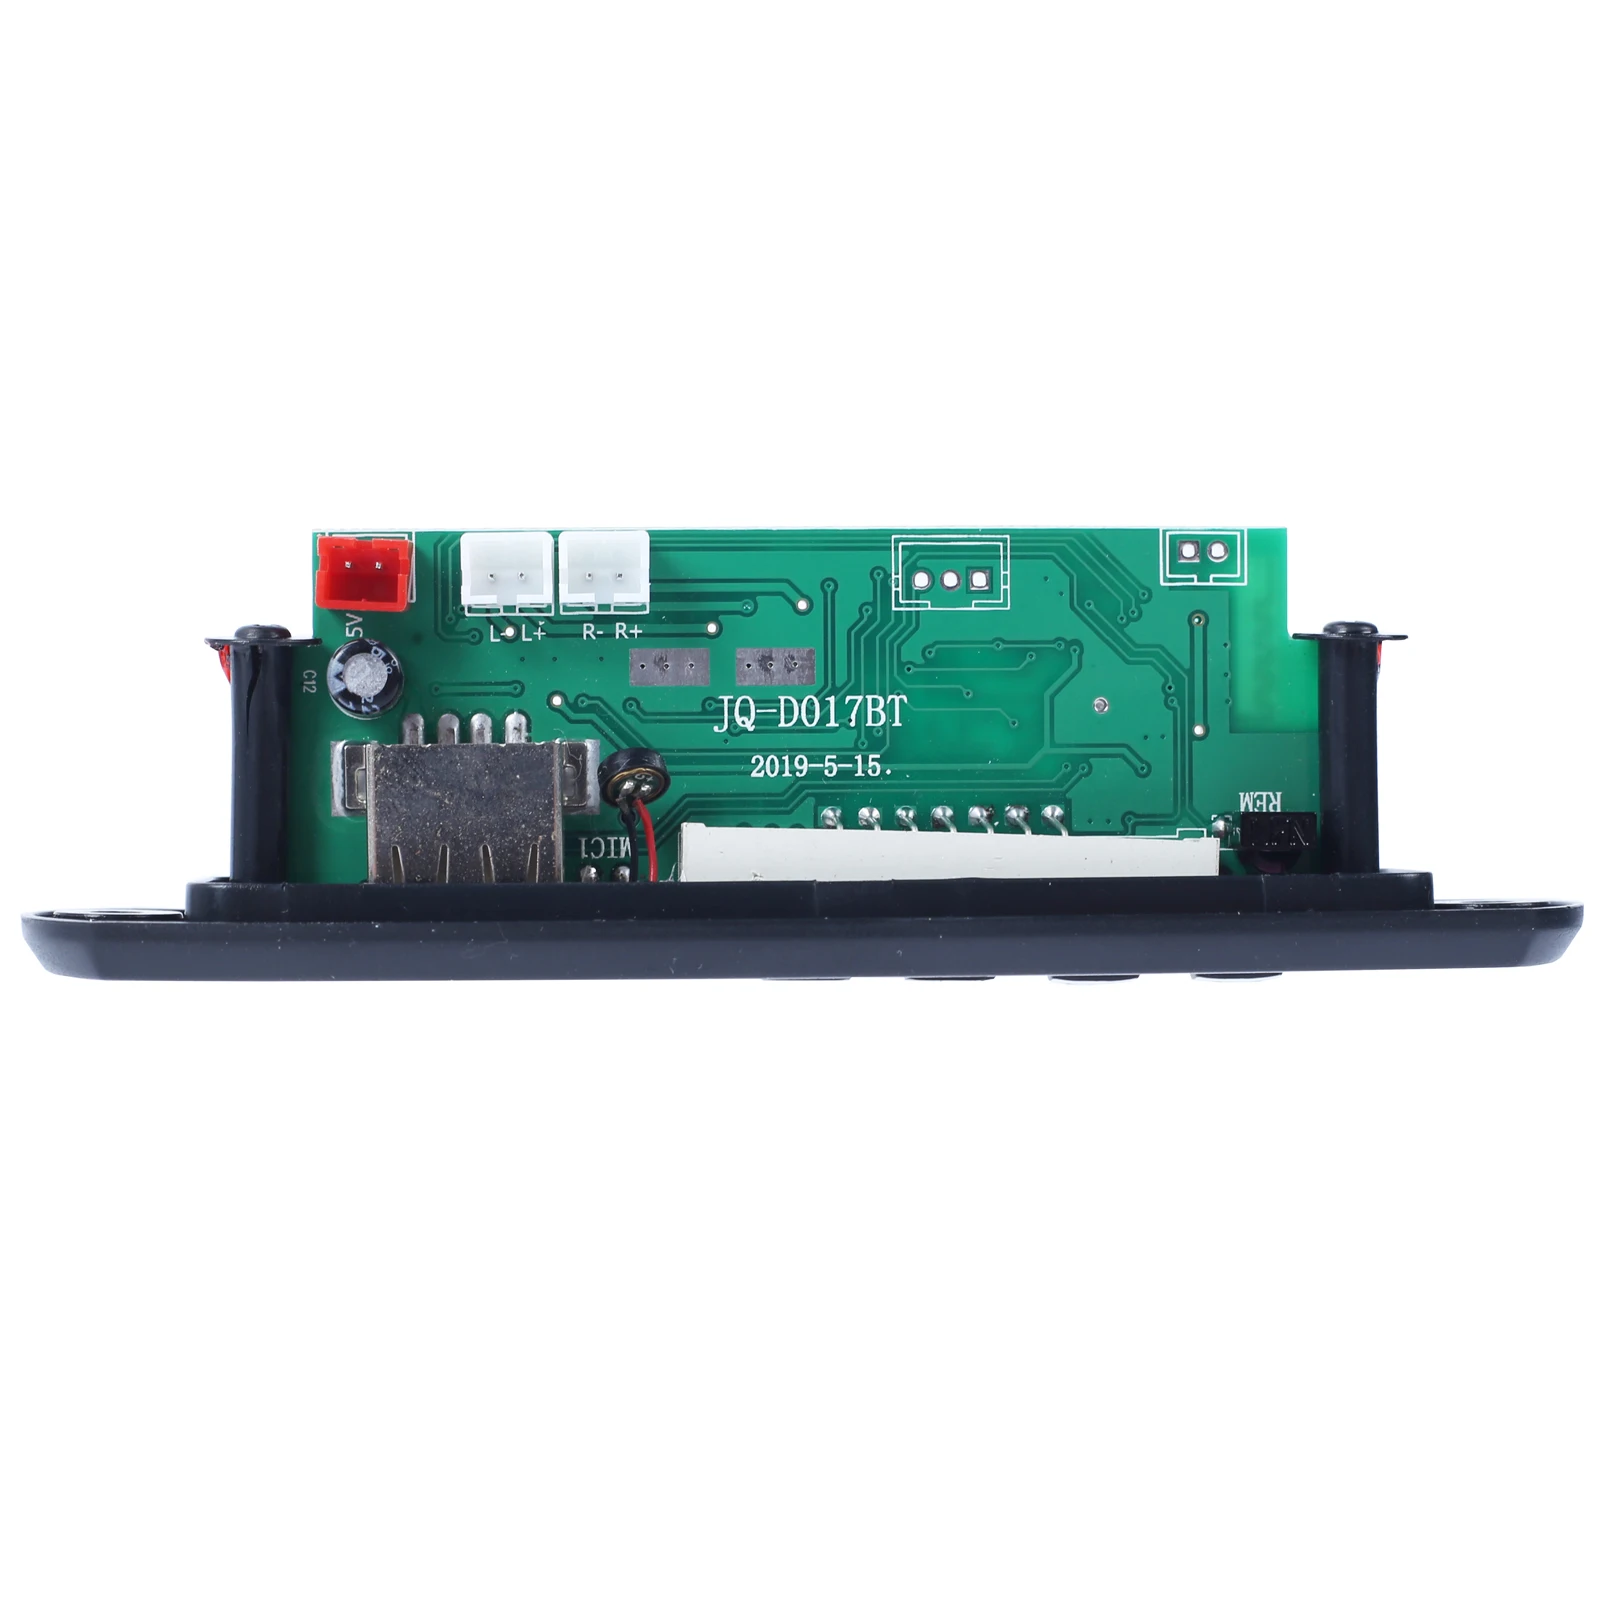
- Model Number: LED Spectrum FM Bluetooth-Compatible Audio Speaker
- Supply Voltage: DC 5V
- Condition: New
- Type: SWITCH
- Brand Name: Monday Kids
- Feature: All-in-1 Audio Experience
- Item: Digital FM Radio Kit
- Type: 87-108MHz FM Digital Radio
- Function: 2 in 1 Bluetooth-Compatible Speaker&Radio

Manual Download: http://attach01.oss-us-west-1.aliyuncs.com/IC/DIY-Manual/GY20950-2.pdf
1.Introduction:
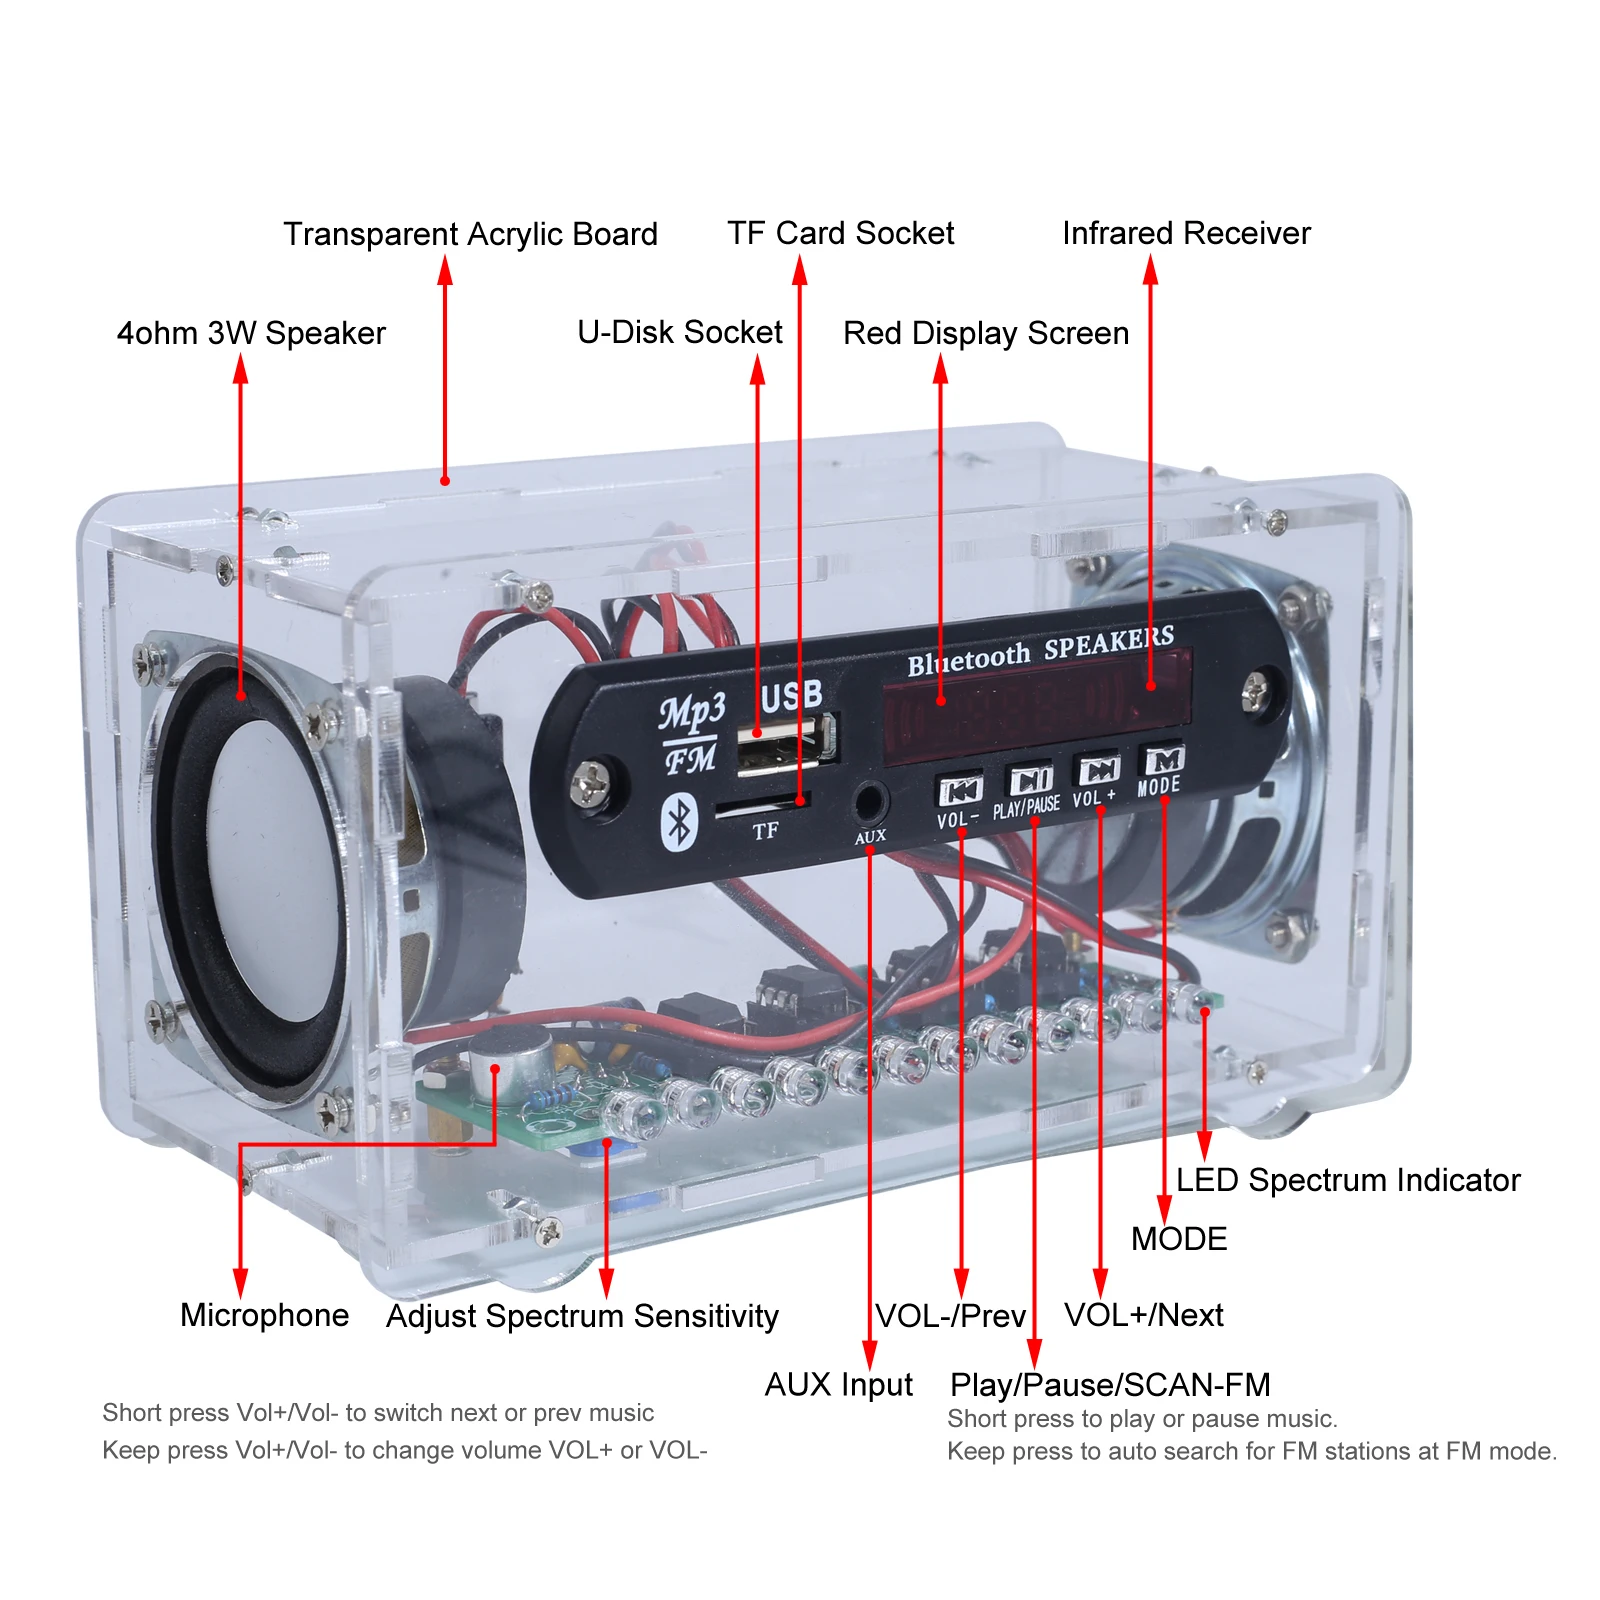
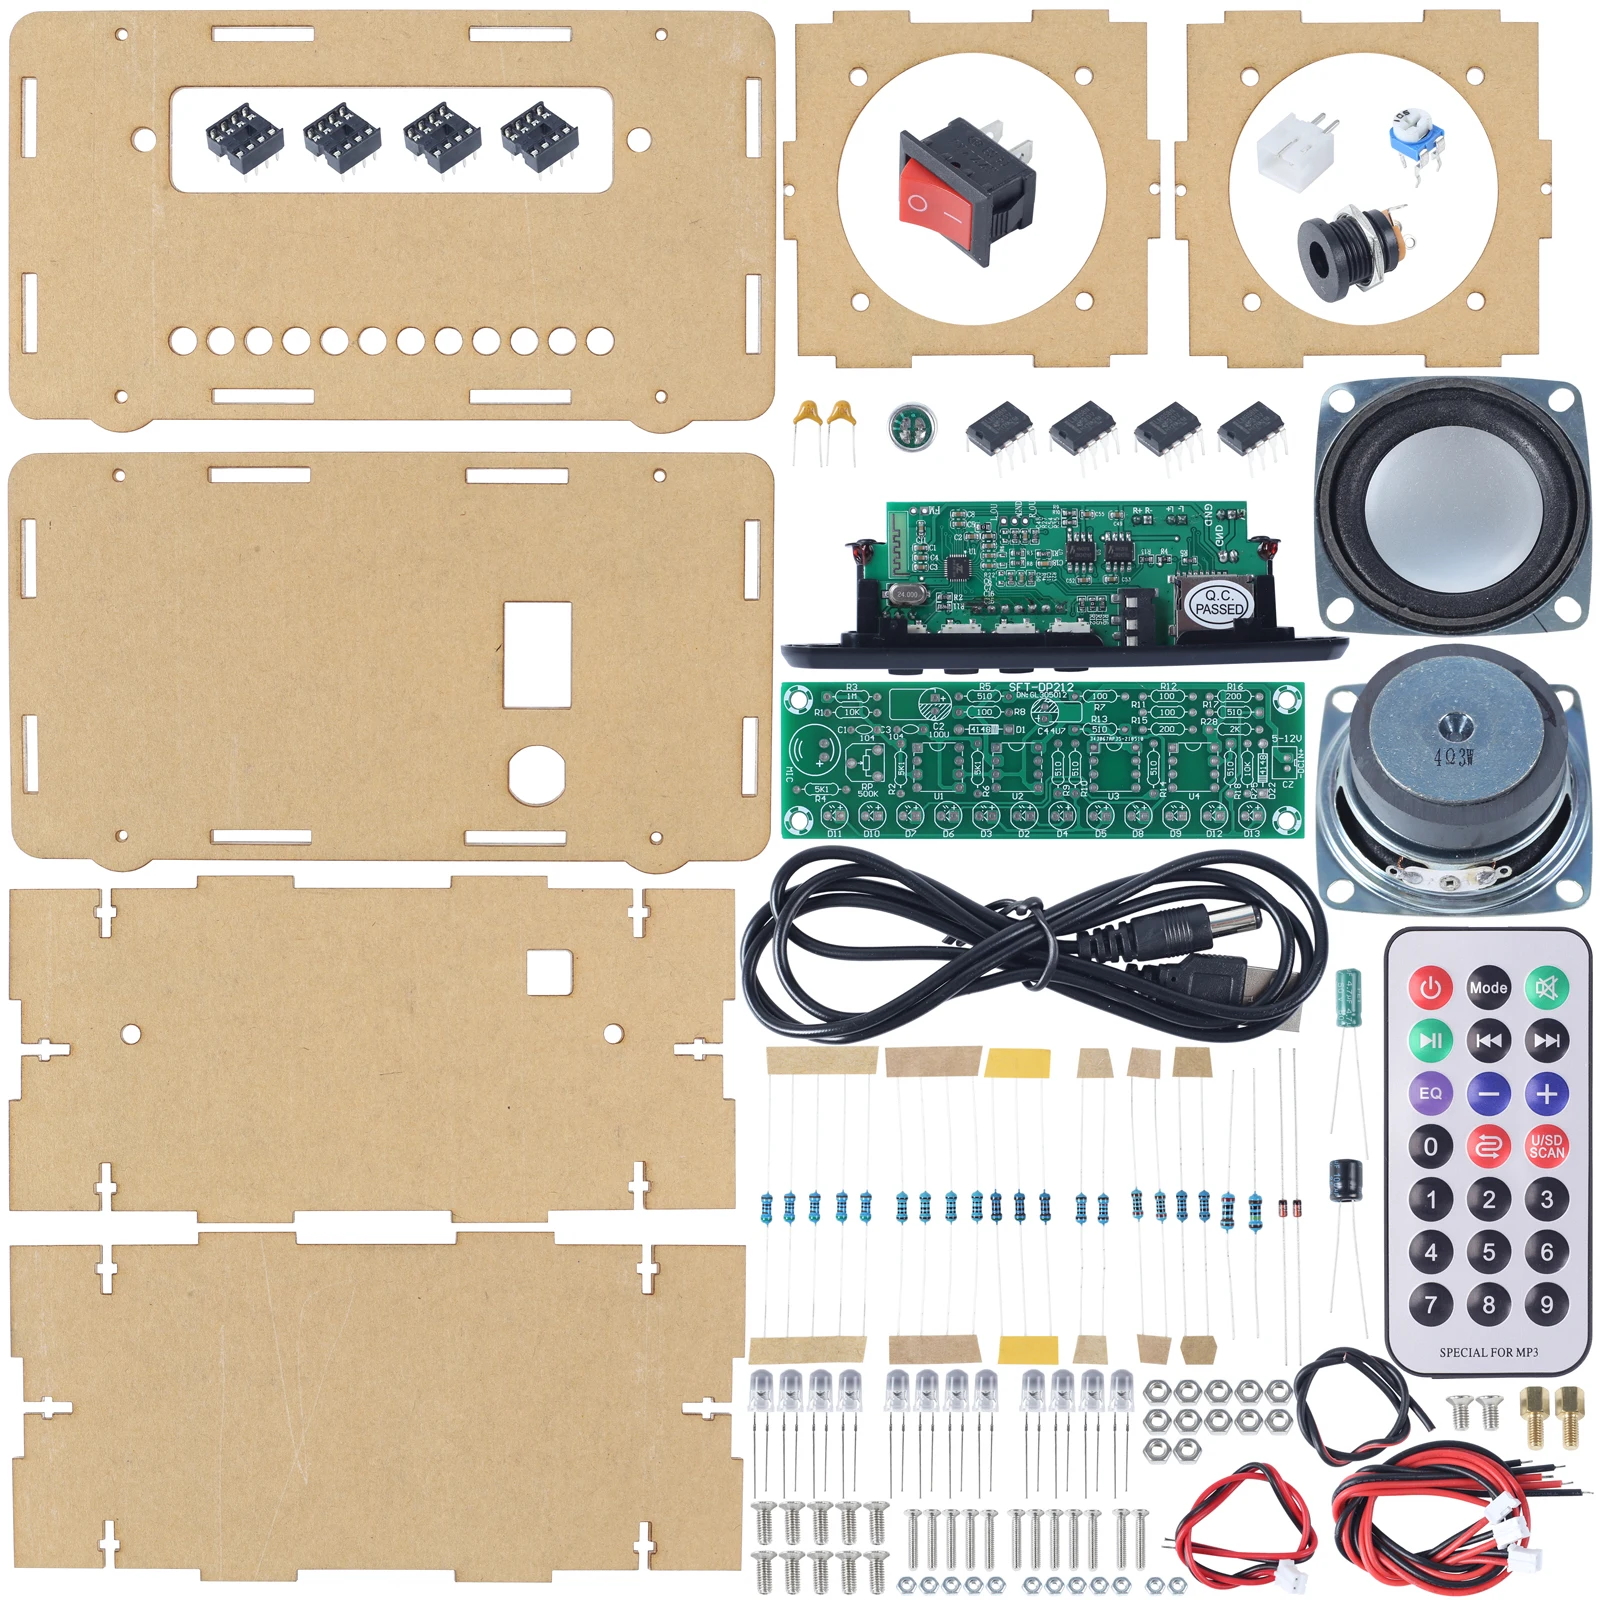
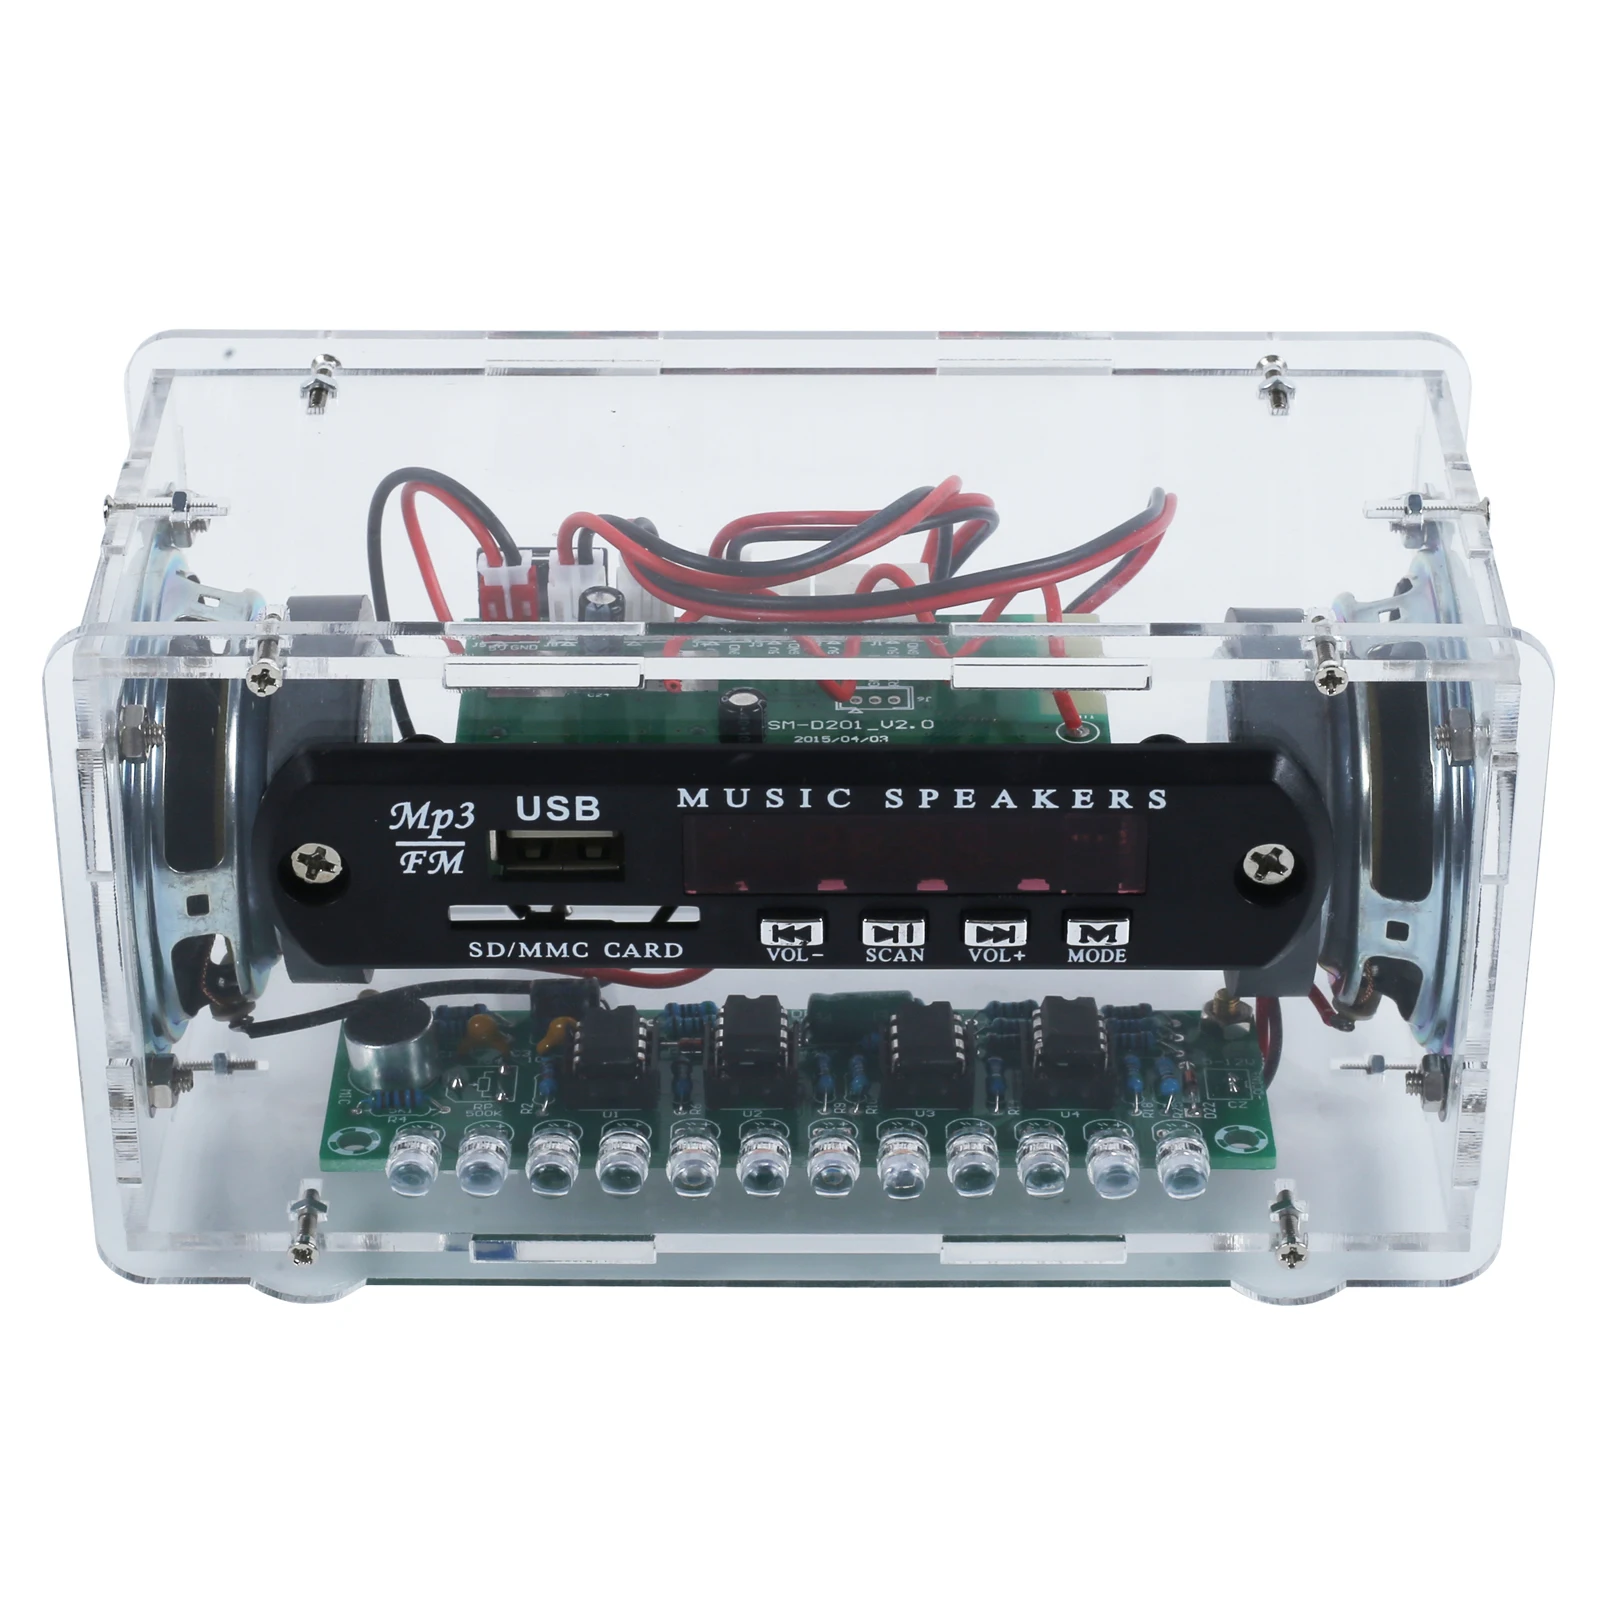
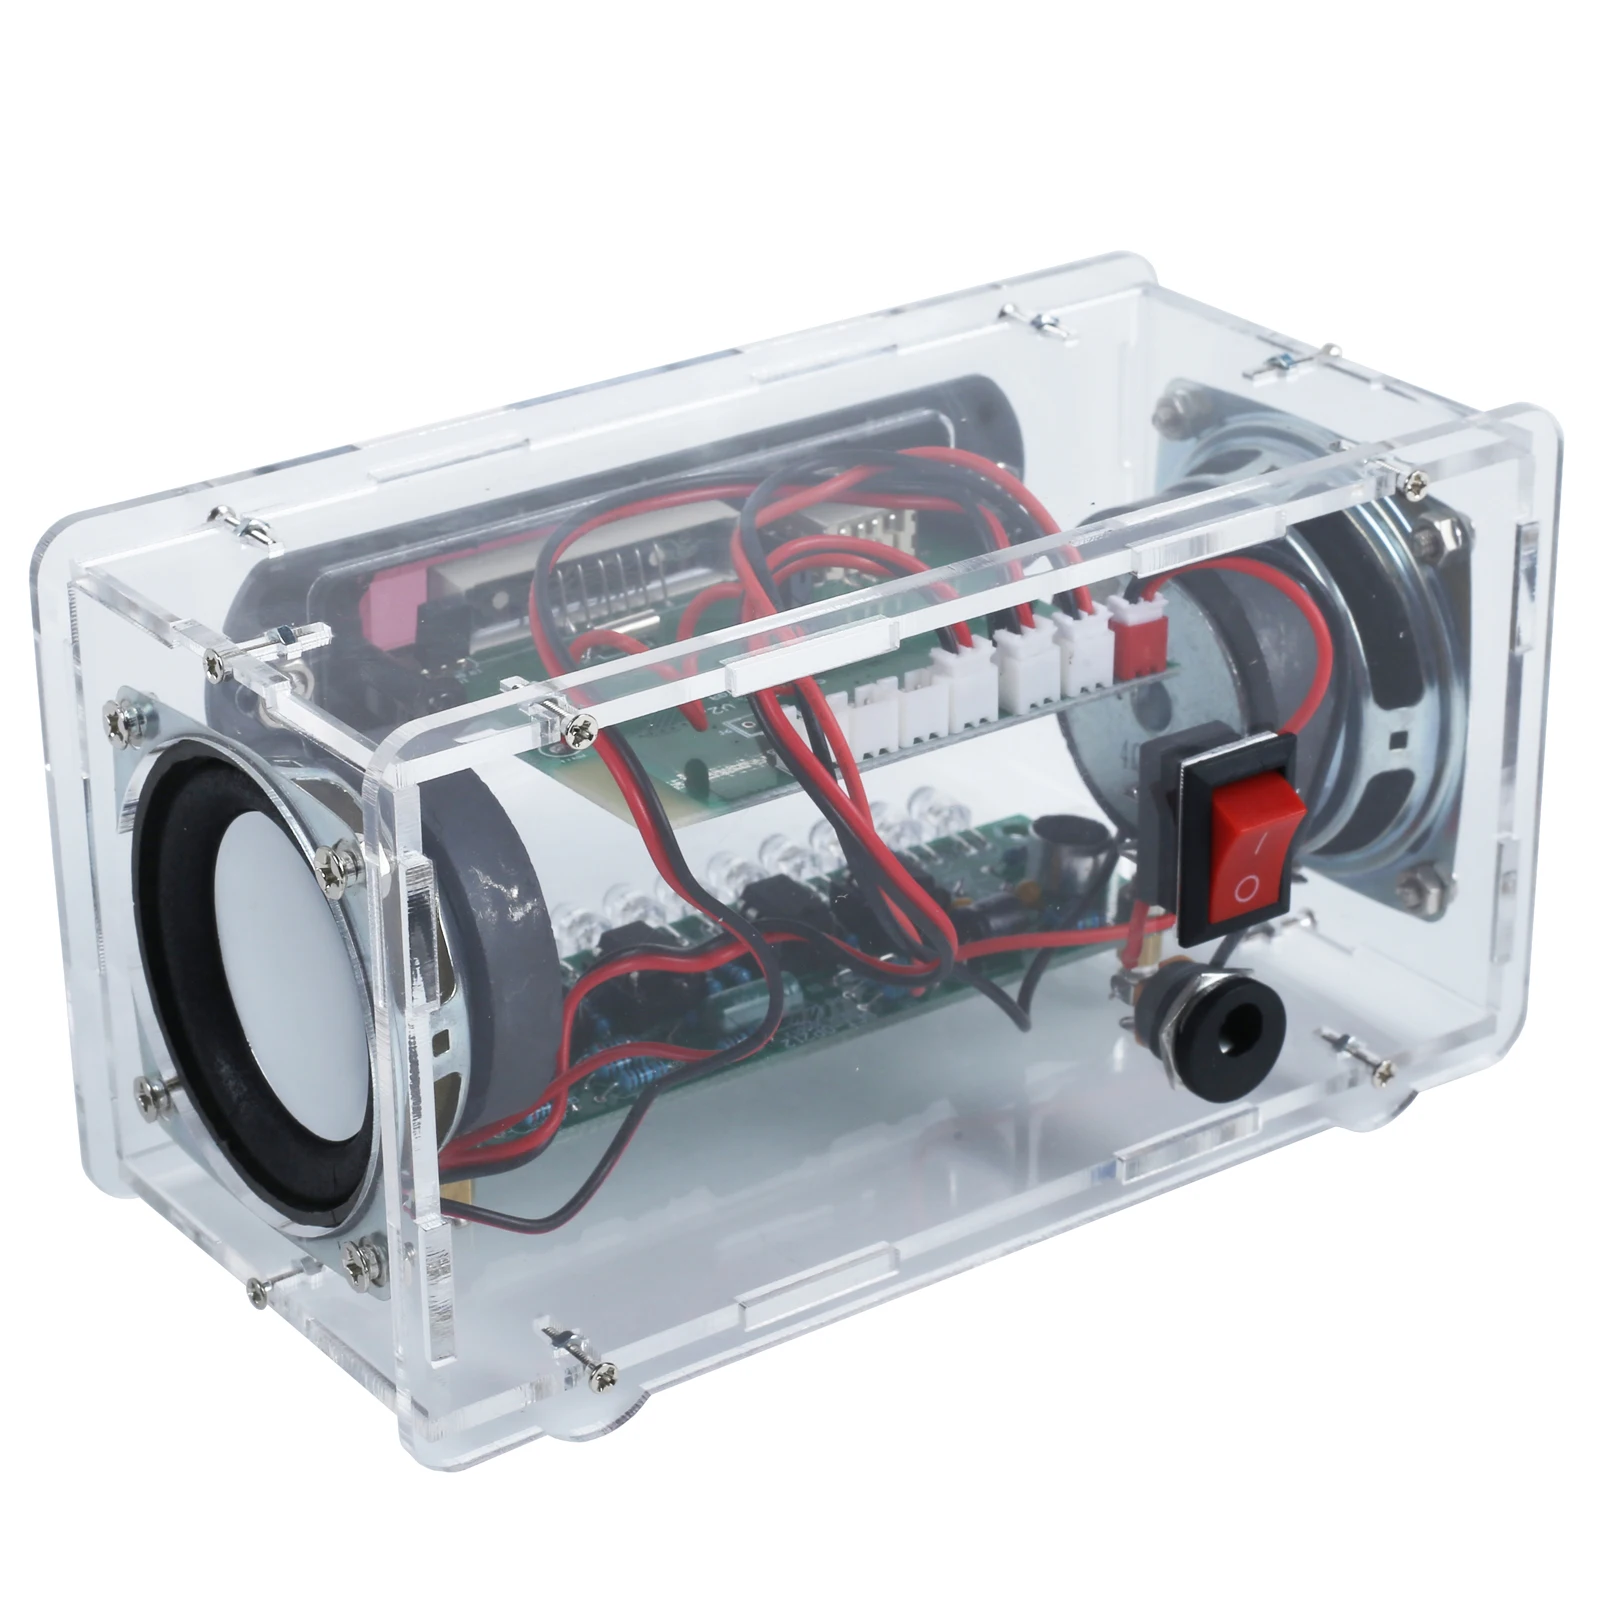
Our versatile electronics kit not only functions as a high-quality Bluetooth-Compatible Speaker but also doubles as an FM radio. The kit also support U-disk/TFCard to play music,saves on your phone battery.It's a DIY kit which comes with various components.
Bluetooth-Compatible Operation: Turn on the Bluetooth-Compatible of the mobile phone, find"DJN-V100" and click connect, then you can enjoy the music.
2.Feature:
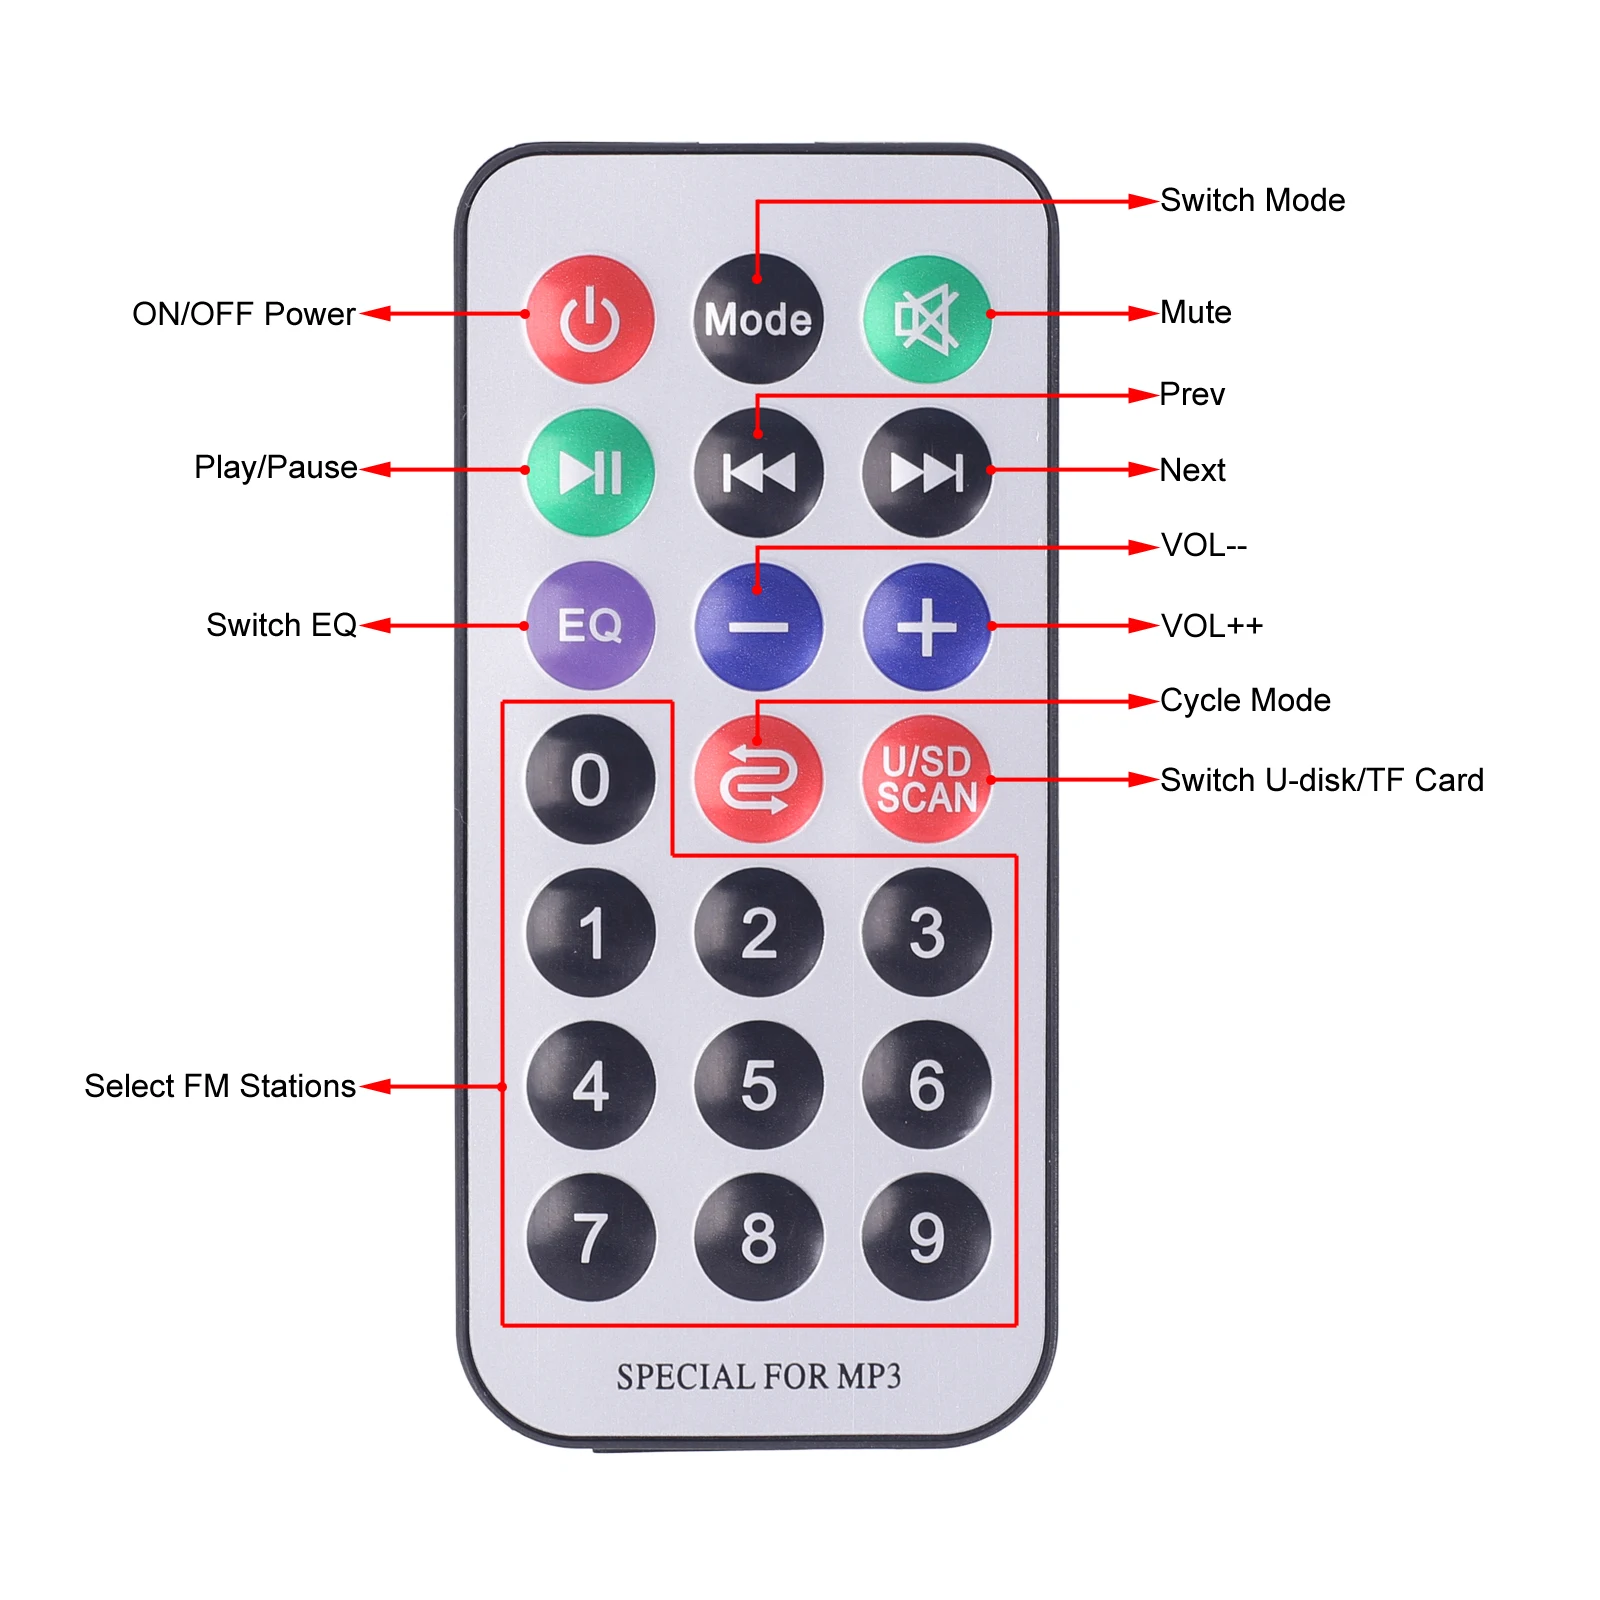
1>.Multi-Audio Source Selectable: This device offers a variety of audio input options, including Bluetooth-Compatible , FM, AUX, U-disk, and TF Card, enabling the playback of MP3 or lossless music files with a screen display indicating the current audio source. Users can control the music playback functions such as play/pause/next/prev/vol+/vol- using either the remote controller or on-board buttons.
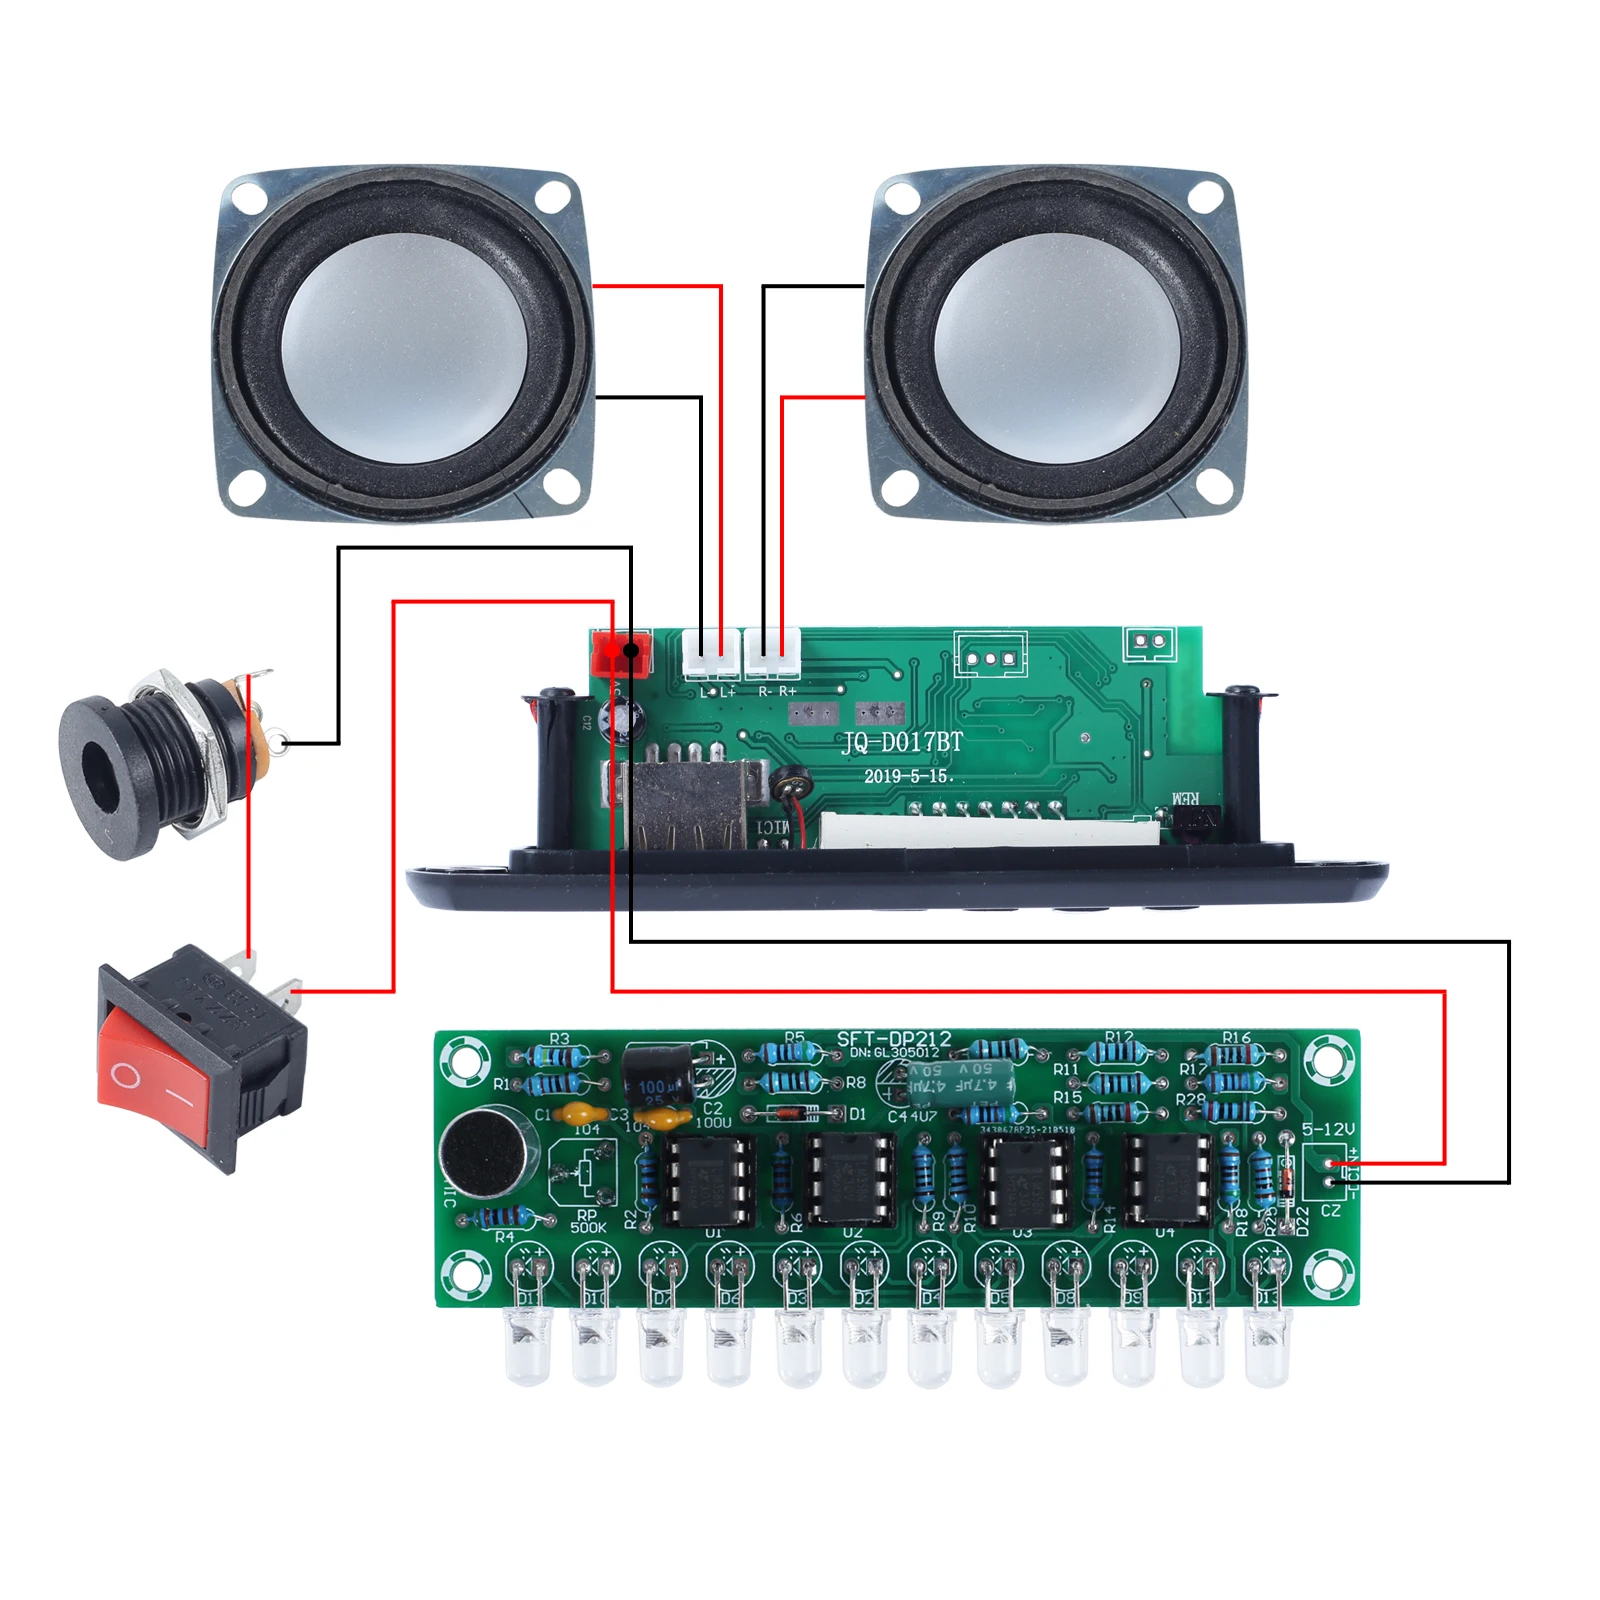
2>.Bluetooth-Compatible Player : With its built-in Bluetooth-Compatible audio receiver and power amplifier, this device can directly drive 4ohm 3W speakers, producing clear and high-quality sound.
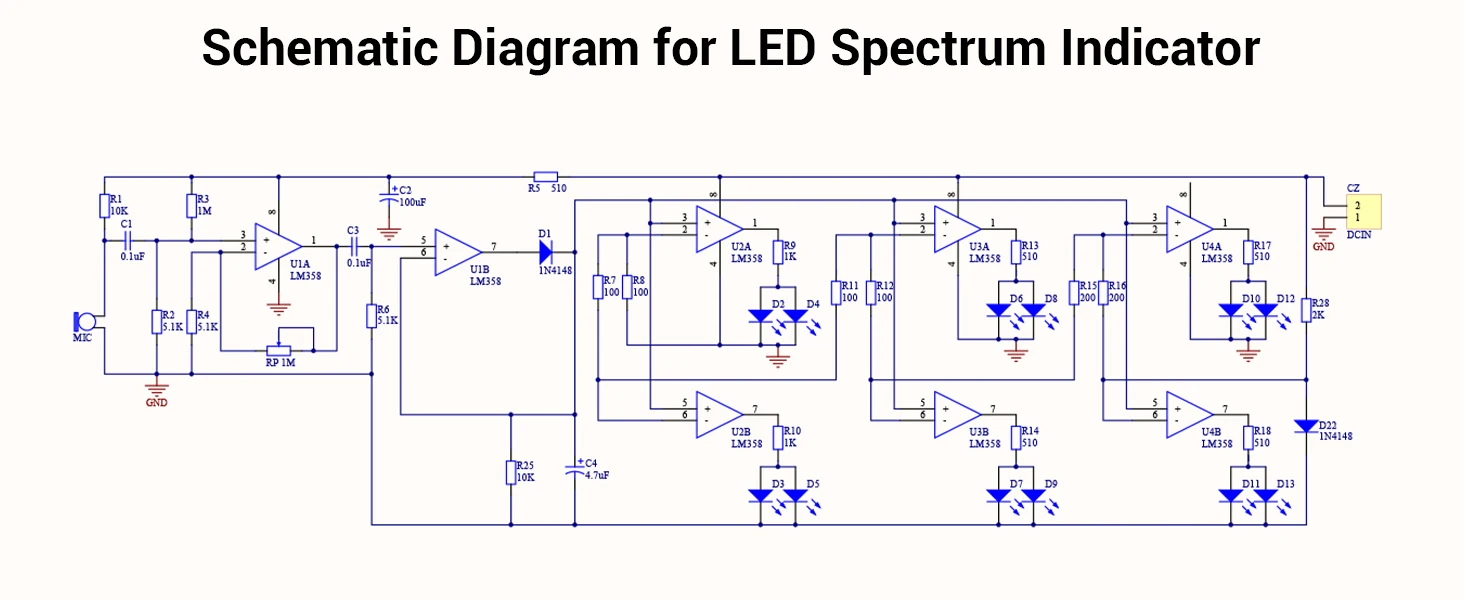
3>.LED Spectrum Display: The device also features 12 pink/blue/green LED spectrum indicators that flash in sync with the music, creating a dynamic and visually stunning lighting effect. The LED audio indicator flashes at both ends simultaneously, and the sensitivity is adjustable using the potentiometer.
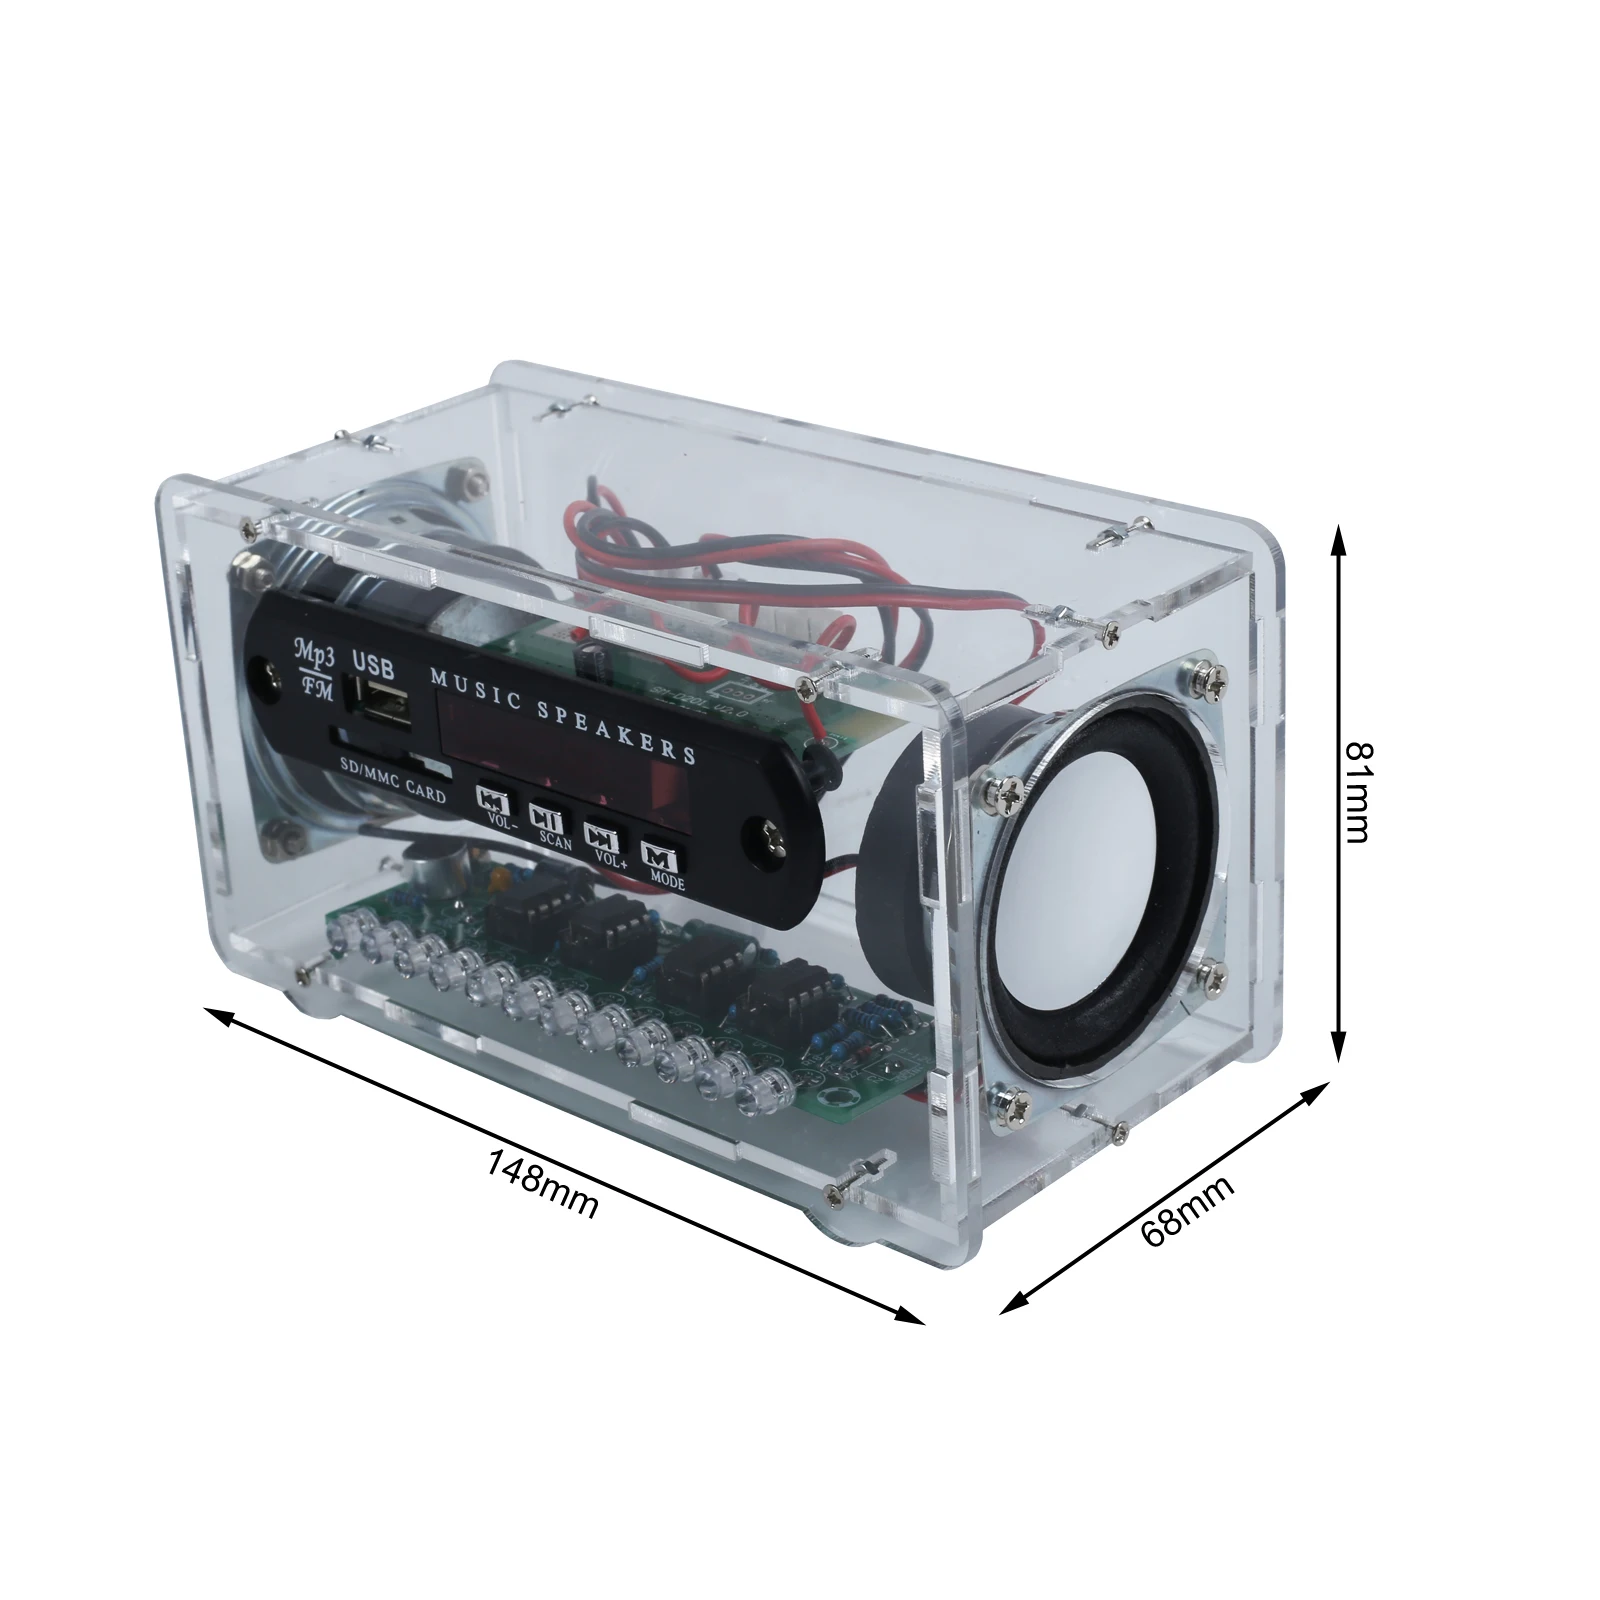
4>.Dual Channel Stereo Speaker: The device can drive two 2.0 3W*2 speakers, producing clear and powerful stereo sound.
3.Parameter:
1>.Product Name:LED Spectrum FM Bluetooth-Compatible Audio Speaker DIY Kit
2>.Work Voltage:DC 5V
3>.Work Current: >1.5A
4>.Speaker: 3W 4ohm
5>.Channel: Dual-Channel Stereo
6>.Audio source:Bluetooth-Compatible /FM/AUX/U-disk/TF Card
7>.FM station: Automatic radio search
8>.Receiver Frequency:87.0MHz~108.0MHz
9>.Frequency accuracy:0.1MHz
10>.Control Type:Bluetooth-Compatible /Remote Controller/On Board Button
11>.LED Color:Pink/Blue/Green
12>.Output type: Speaker
13>.Audio format:APE/FLAC/WAV/MP3/WMA
14>.Power interface: DC-005 Power Socket
15>.Work Temperature:-20~85
16>.Work Humidity:5%~85%RH
17>.Size(Installed):148*81*68mm
4.Use Methods:
1>.Switch Red/Black Switch to turn ON/OFF work power supply.
2>.MODE Button: Switch Audio Mode. Press the button to alternate between Bluetooth-Compatible , FM, AUX, U-disk, and TF Card playback modes. Note: When using U-disk or TF Card, insert it first to play music.
3>.SCAN Button: Short press to play or pause music. Press and hold for 3 seconds to initiate automatic radio search in FM mode.
4>.VOL+ Button: Short press to switch next music. Hold it down for 3 seconds to increase the volume (V++).
5>.VOL- Button: Short press to switch previous music. Hold it down for 3 seconds to decrease the volume (V--).
6>.Potentiometer: It is used to adjust volume by screwdriver.
5.Application:
1>.Training welding skills
2>.Student school
3>.DIY production
4>.Project Design
5>.Electronic competition
6>.Gift giving
7>.Crafts collection
8>.Home decoration
9>.Souvenir collection
10>.Graduation design
11>.Holiday gift
6.Installation Tips:
1>.User needs to prepare the welding tool at first.
1.1>.Soldering iron (<50 Watt)
1.2>.Rosin core ("radio") solder
1.3>.Wire cutters
1.4>.Wire strippers
1.5>.Philips screwdriver
2>.Please be patient until the installation is complete.
3>.The package is DIY kit.It need finish install by user.
4>.The soldering iron can't touch the components for a long time(3s), otherwise damage components.
5>.Pay attention to the positive and negative of the components.
6>.Strictly prohibit short circuit.
7>.User must install the LED according to the specified rules.Otherwise some LED will not light.
8>.Install complex components preferentially.
9>.Make sure all components are in right direction and right place.
10>.Check that all of the LED can be illuminated.
11>.It is strongly recommended to read the installation manual before starting installation!!!
12>.Please wear anti-static gloves or anti-static wristbands when installing electronic components.
Write Your Own Review
Discover More Products from Its Parent Categories: